PROP CONSTRUCTION: FROM CONCEPTION TO EXECUTION, BY ERIN OCAMPO
To start out, what is a prop? A prop, short for property, is any object onstage during a performance that is not part of the set or worn. In the industry, we often use the moving truck analogy; anything that you would pack up with you when you are moving to a new house can be considered a prop. This can range in size from small items such as coins to a massive stage-spanning bar, and anything and everything in between. It is the job of the prop designer and prop shop to enhance the storytelling of the play by creating an immersive and consistent setting.
There are several things to consider when you are designing and executing a prop.
What does the prop need to do physically and in terms of storytelling?
Is there a historical precedent for what the prop looks like?
What does the audience expect the prop to look like, and how is it different from the research?
So how does this relate to The Children? The prop I’ll be walking you through is the ideation and build of a Geiger counter. I’ll avoid spoilers for the play, but physically, this particular prop had to “measure radiation” and be able to distinctly point to highly-radiated areas.
I explored actual Geiger counters from modern to historical, and decided that narratively I wanted it to draw attention and look like a relic of an era where nuclear threats seemed much more viable. I combined elements of various Cold War-era Geiger counters and built around buttons, switches, knobs, and screens I could easily acquire. Since I have access to a 3D printer, I decided to build the whole case from scratch to make sure it could easily be held in one hand.

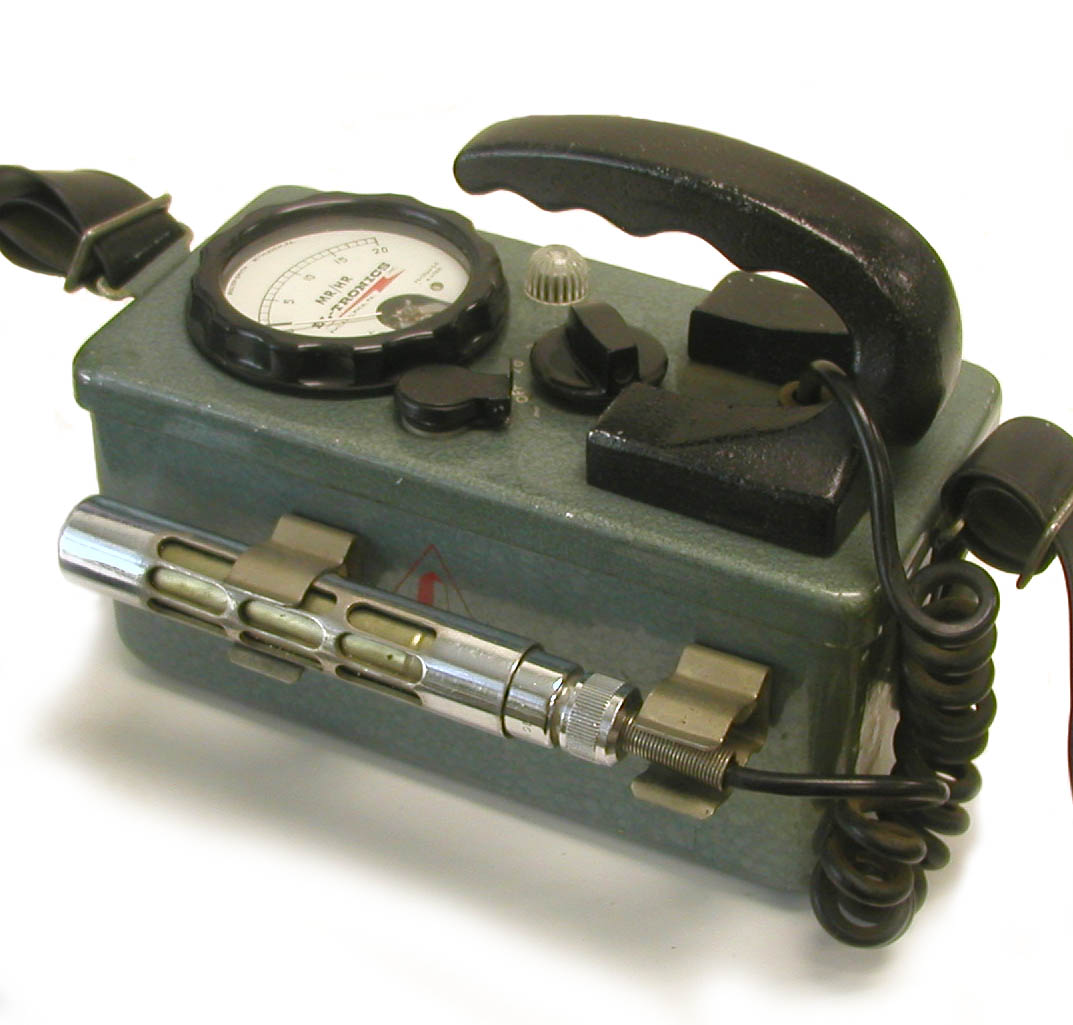
The above are examples of modern and historical Geiger counters. I was drawn to the yellow of the first one since it is so distinct from anything else on stage.


The above pictures are preexisting items that I drafted a 3D model around, so that there would be tactile and resilient items.


These images are my drafted Geiger counter body, including holes for the screen, switches, cabling, and threaded holes so that the face plate could be removable.
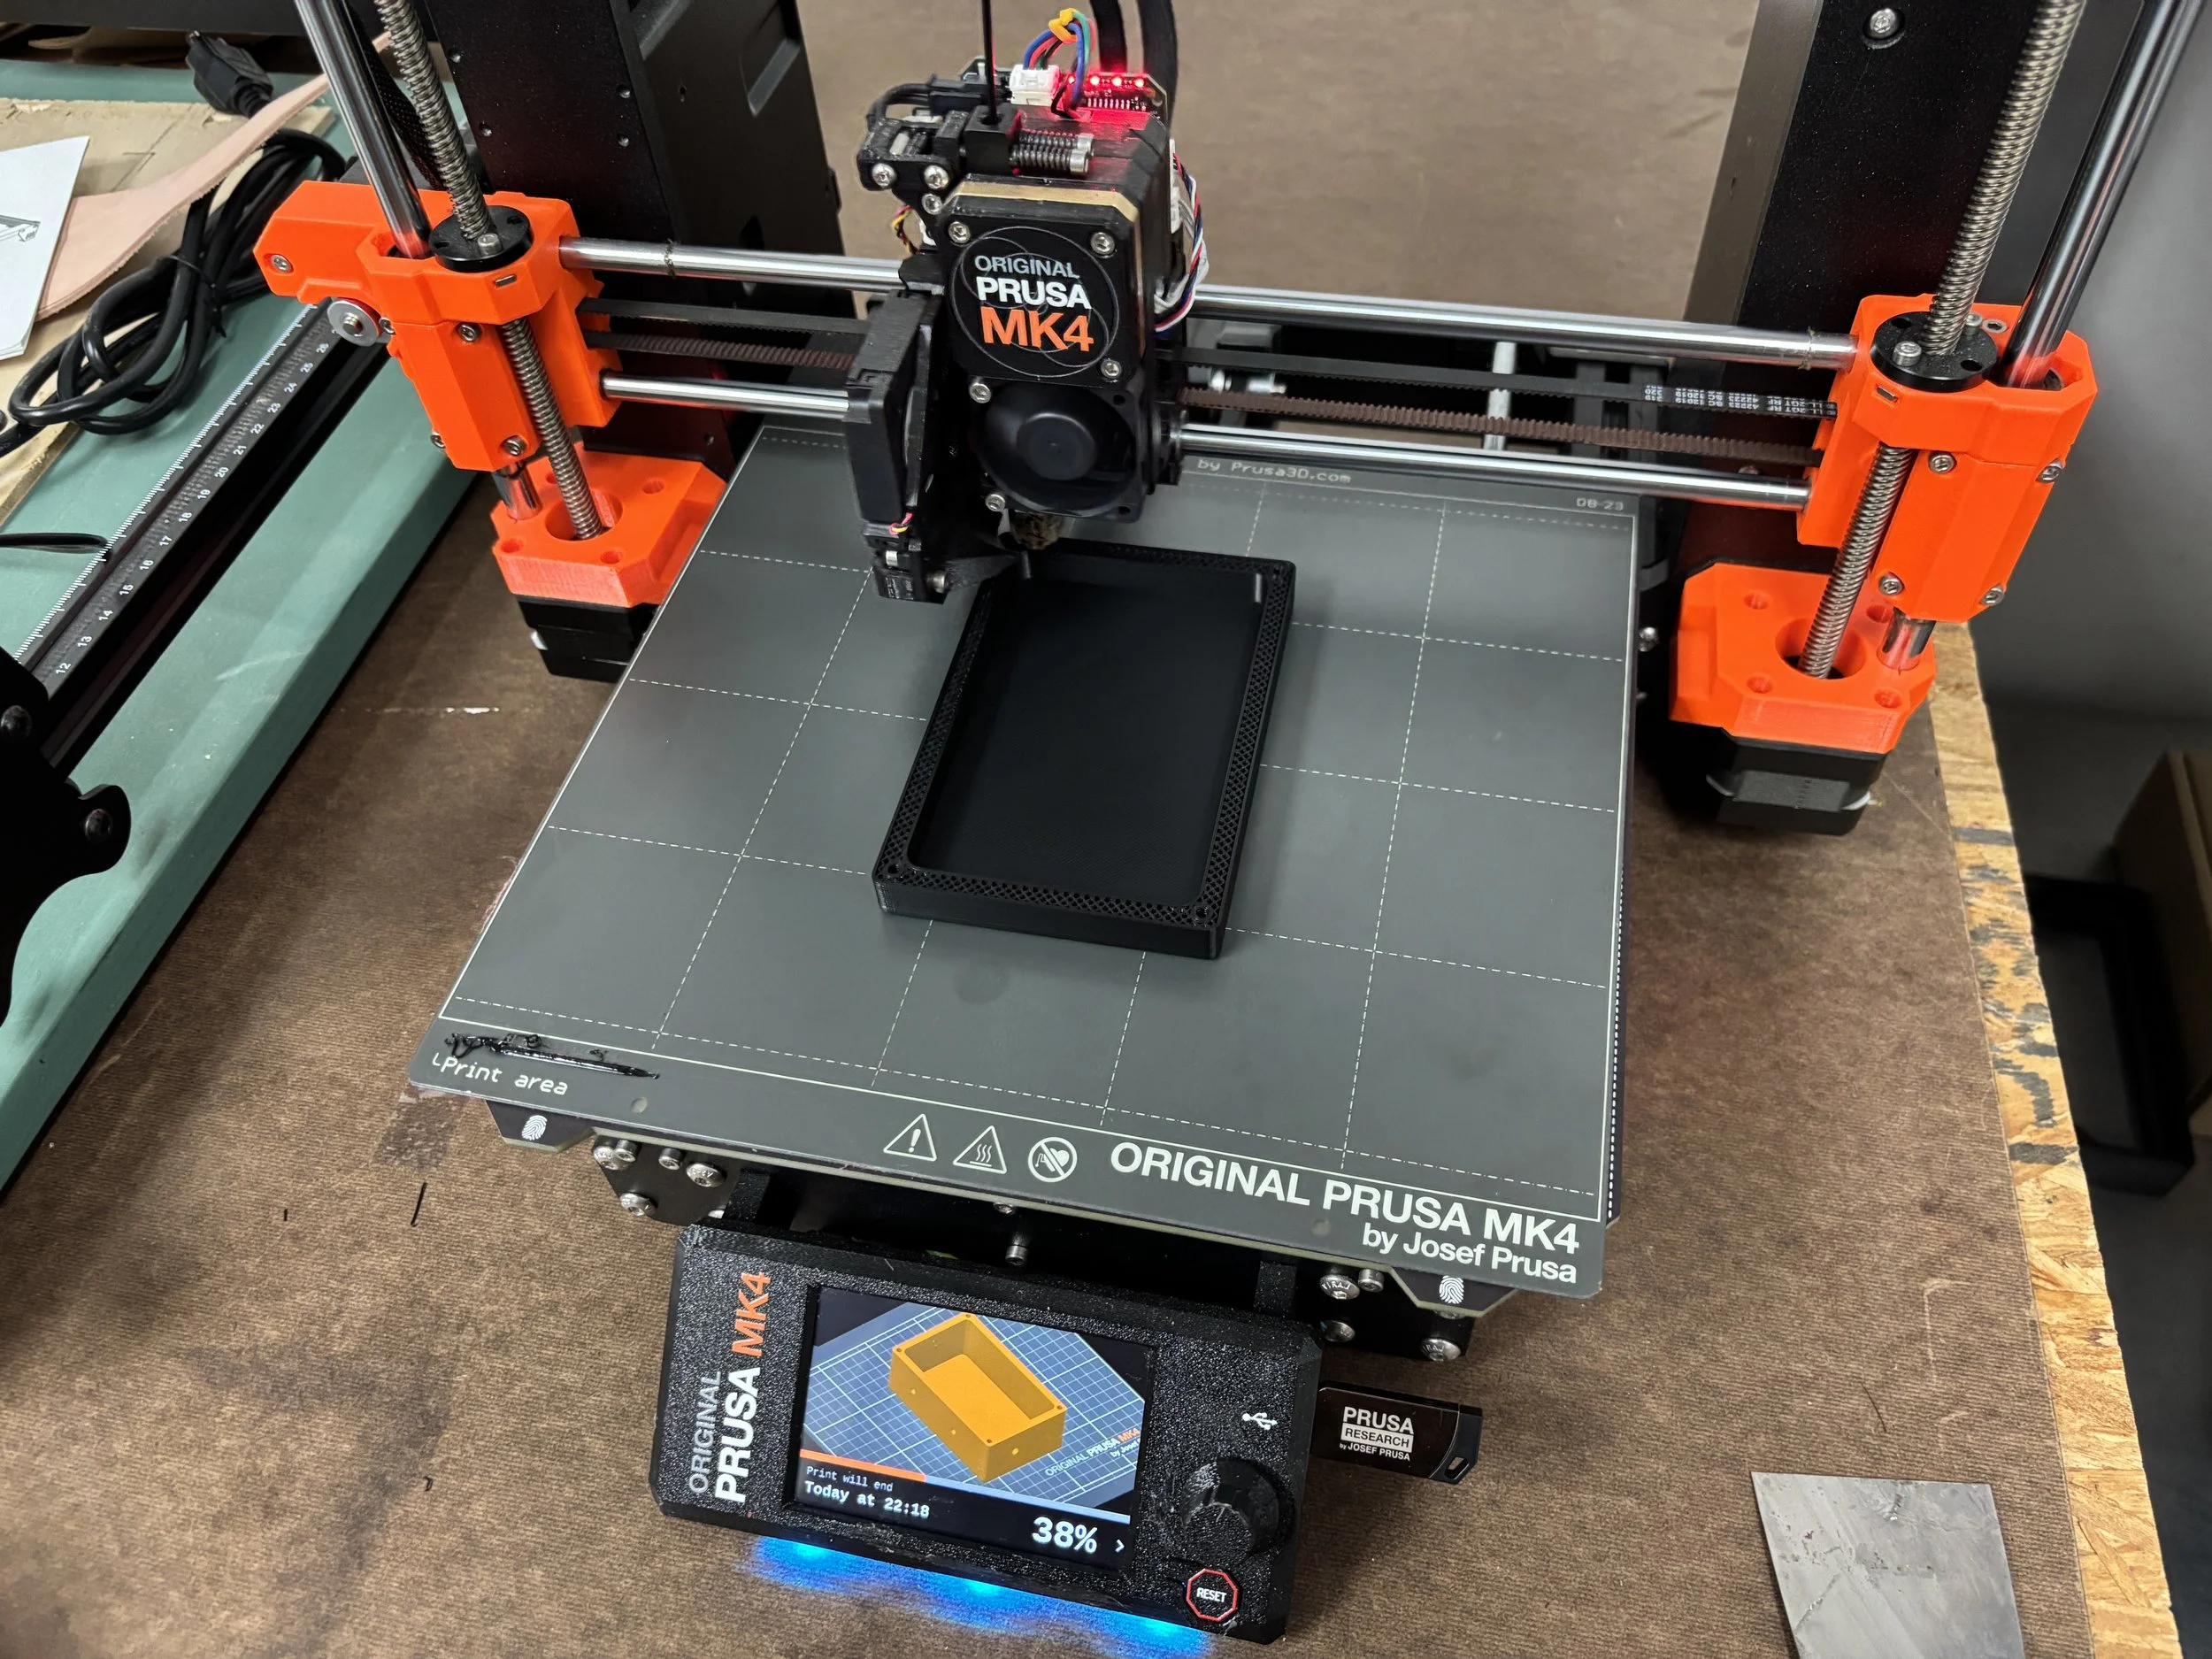
Above is the the body print in progress on the Prusa MK4, a FDM 3D printer.

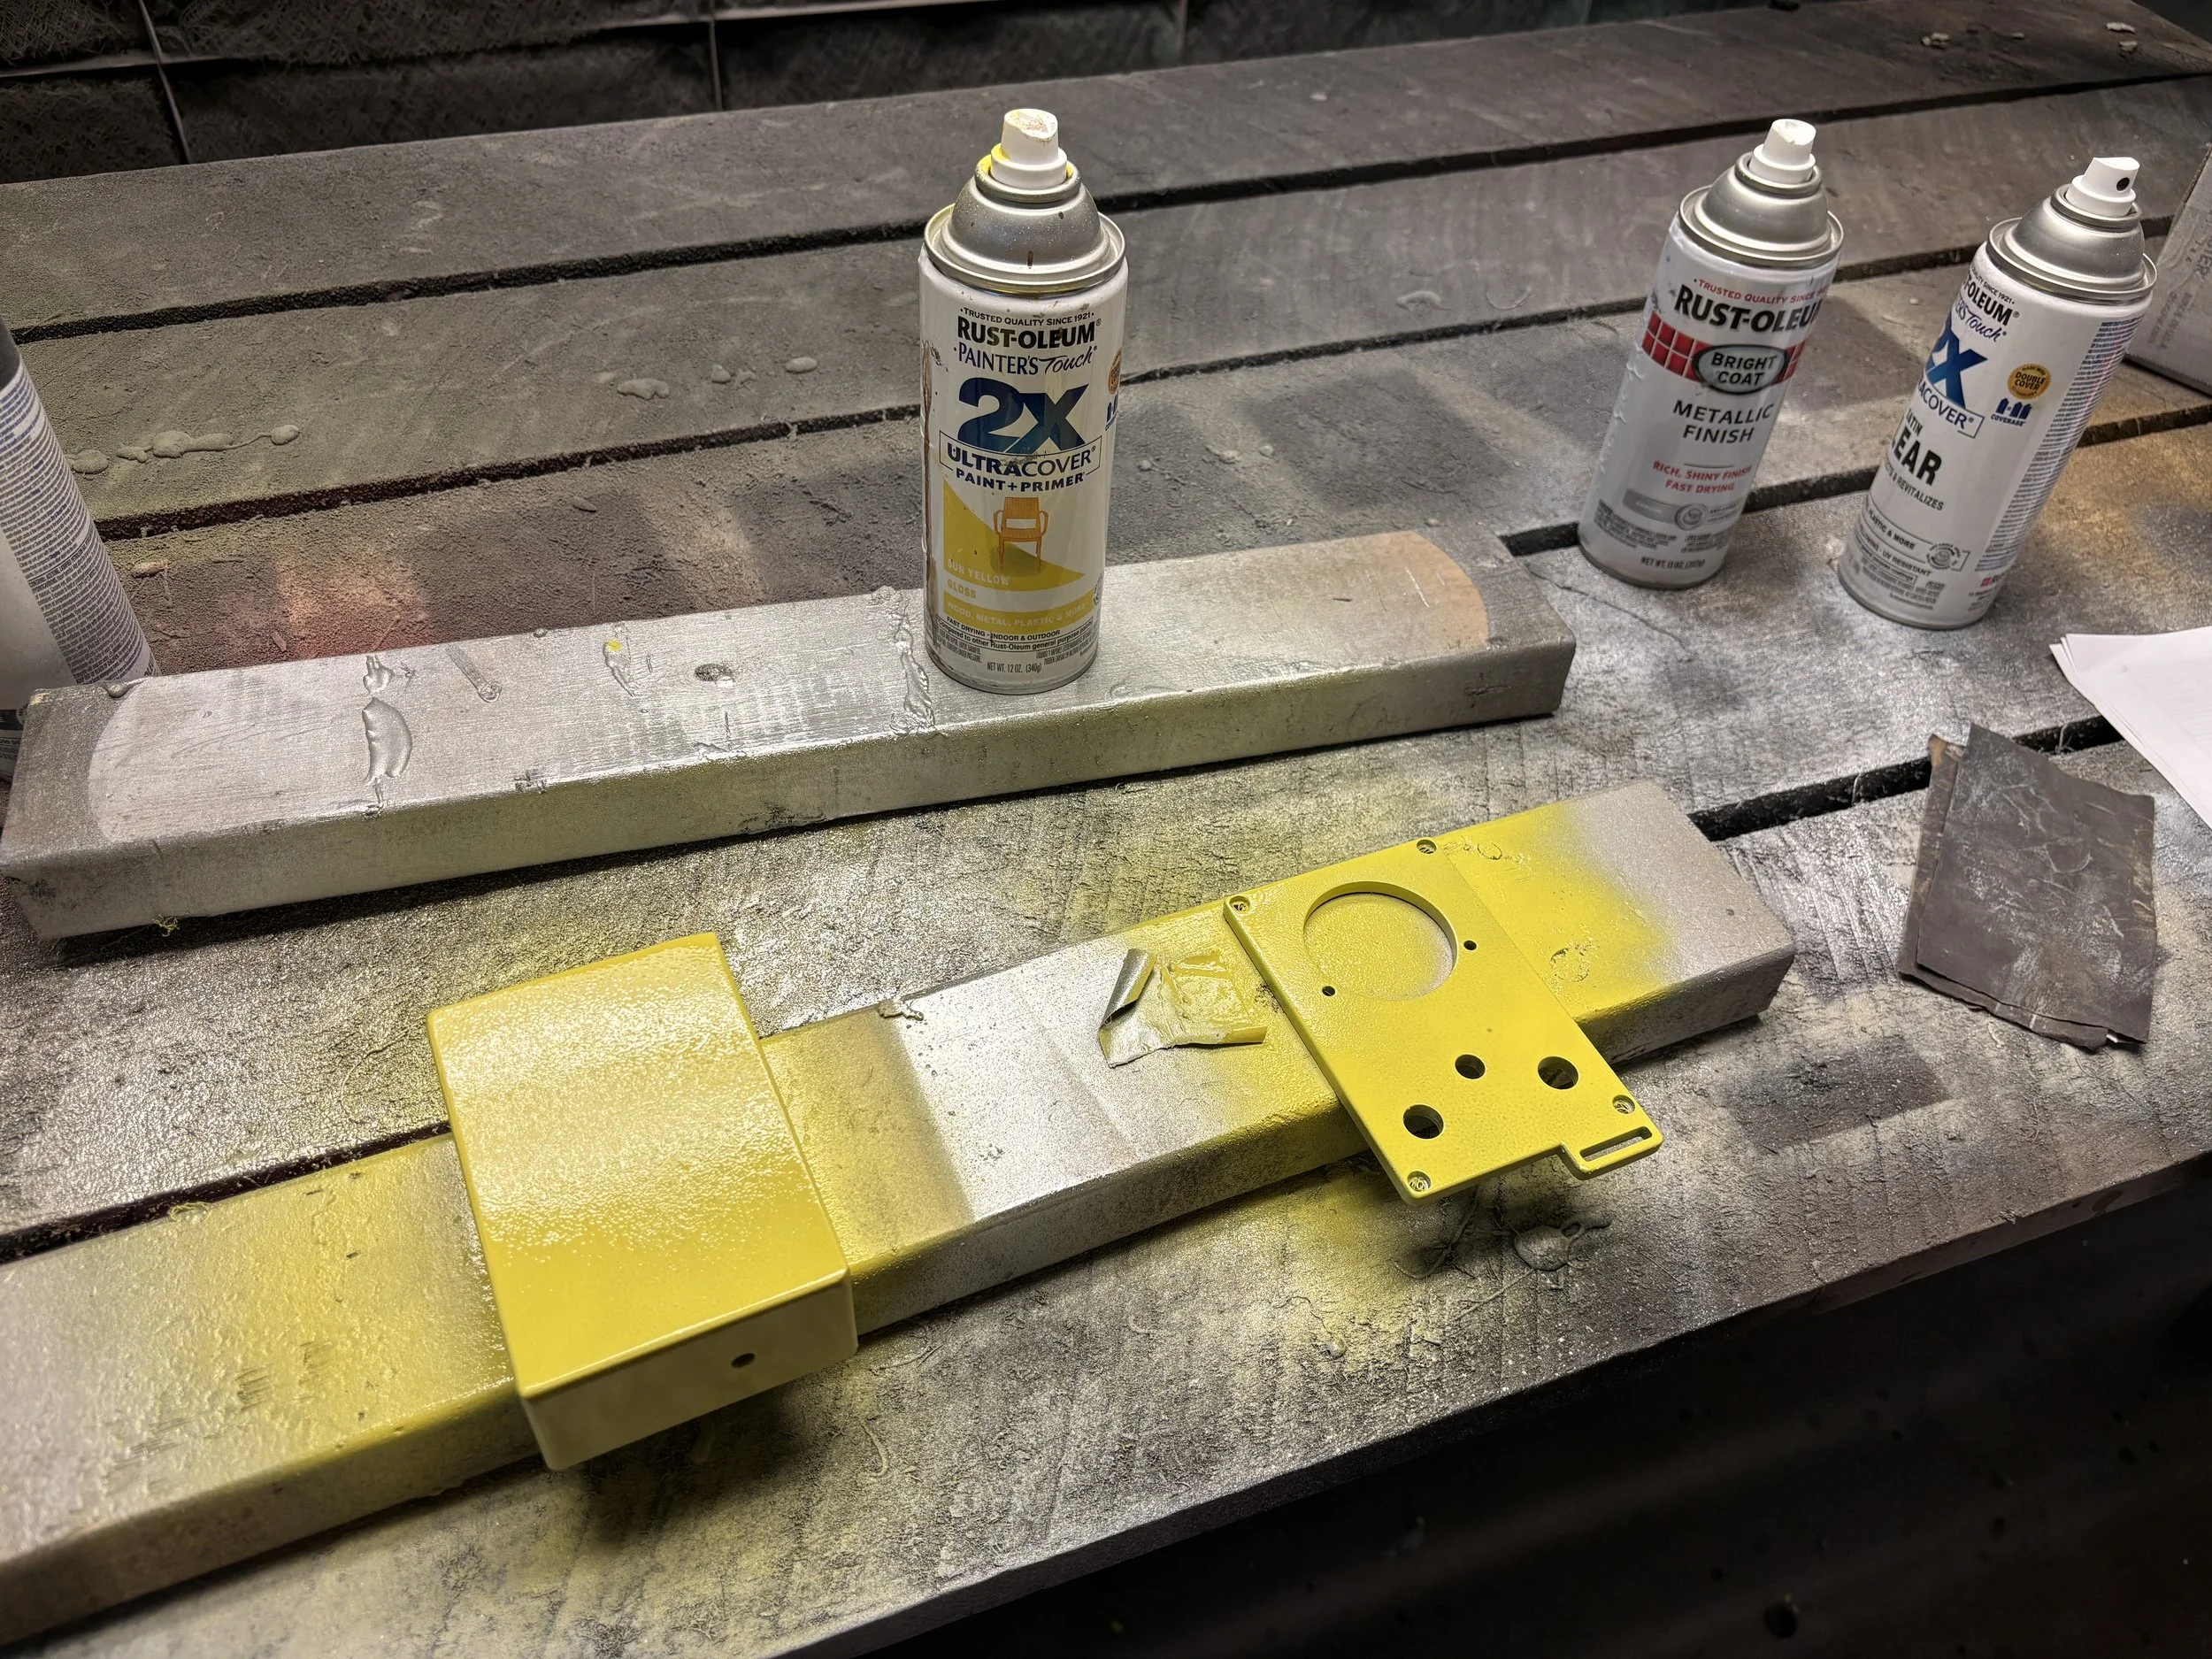
I did some layering of spray paints to create levels when it gets distressed.


Above, you can see how I brushed acrylic over the spray paint in a slightly different shade of yellow, so that the layers could get peeled and chipped back to reveal the undercoat.

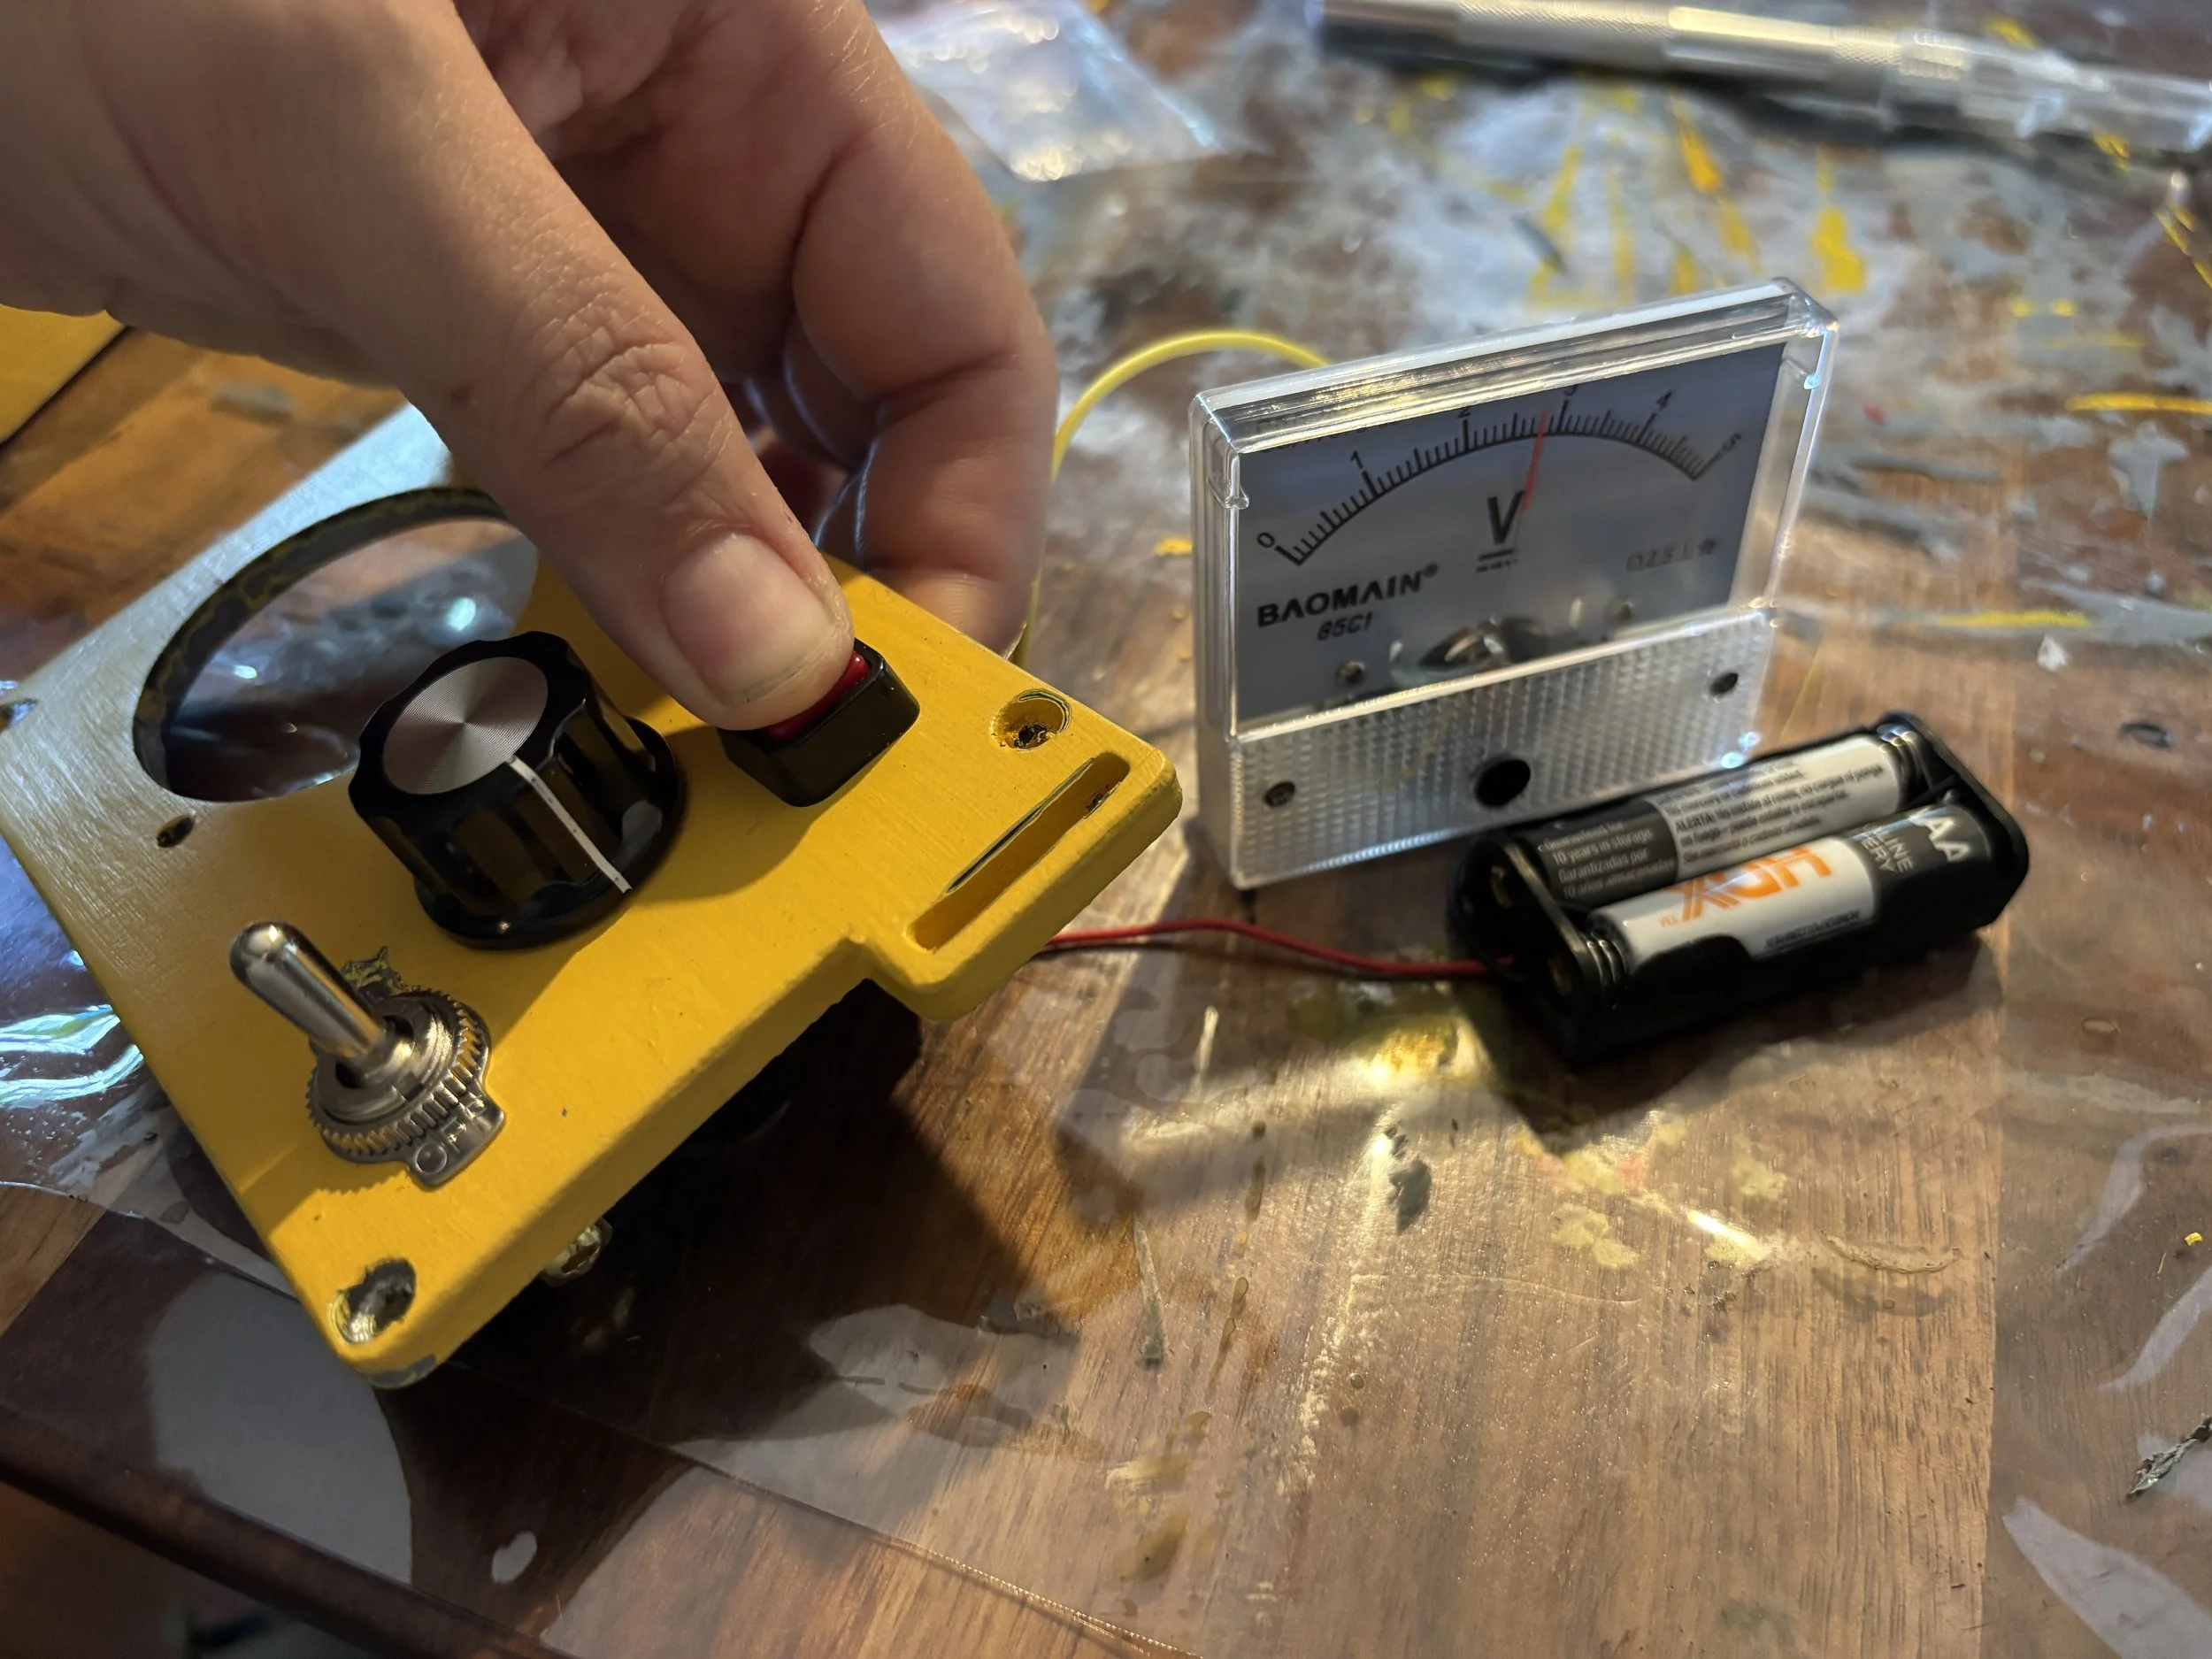
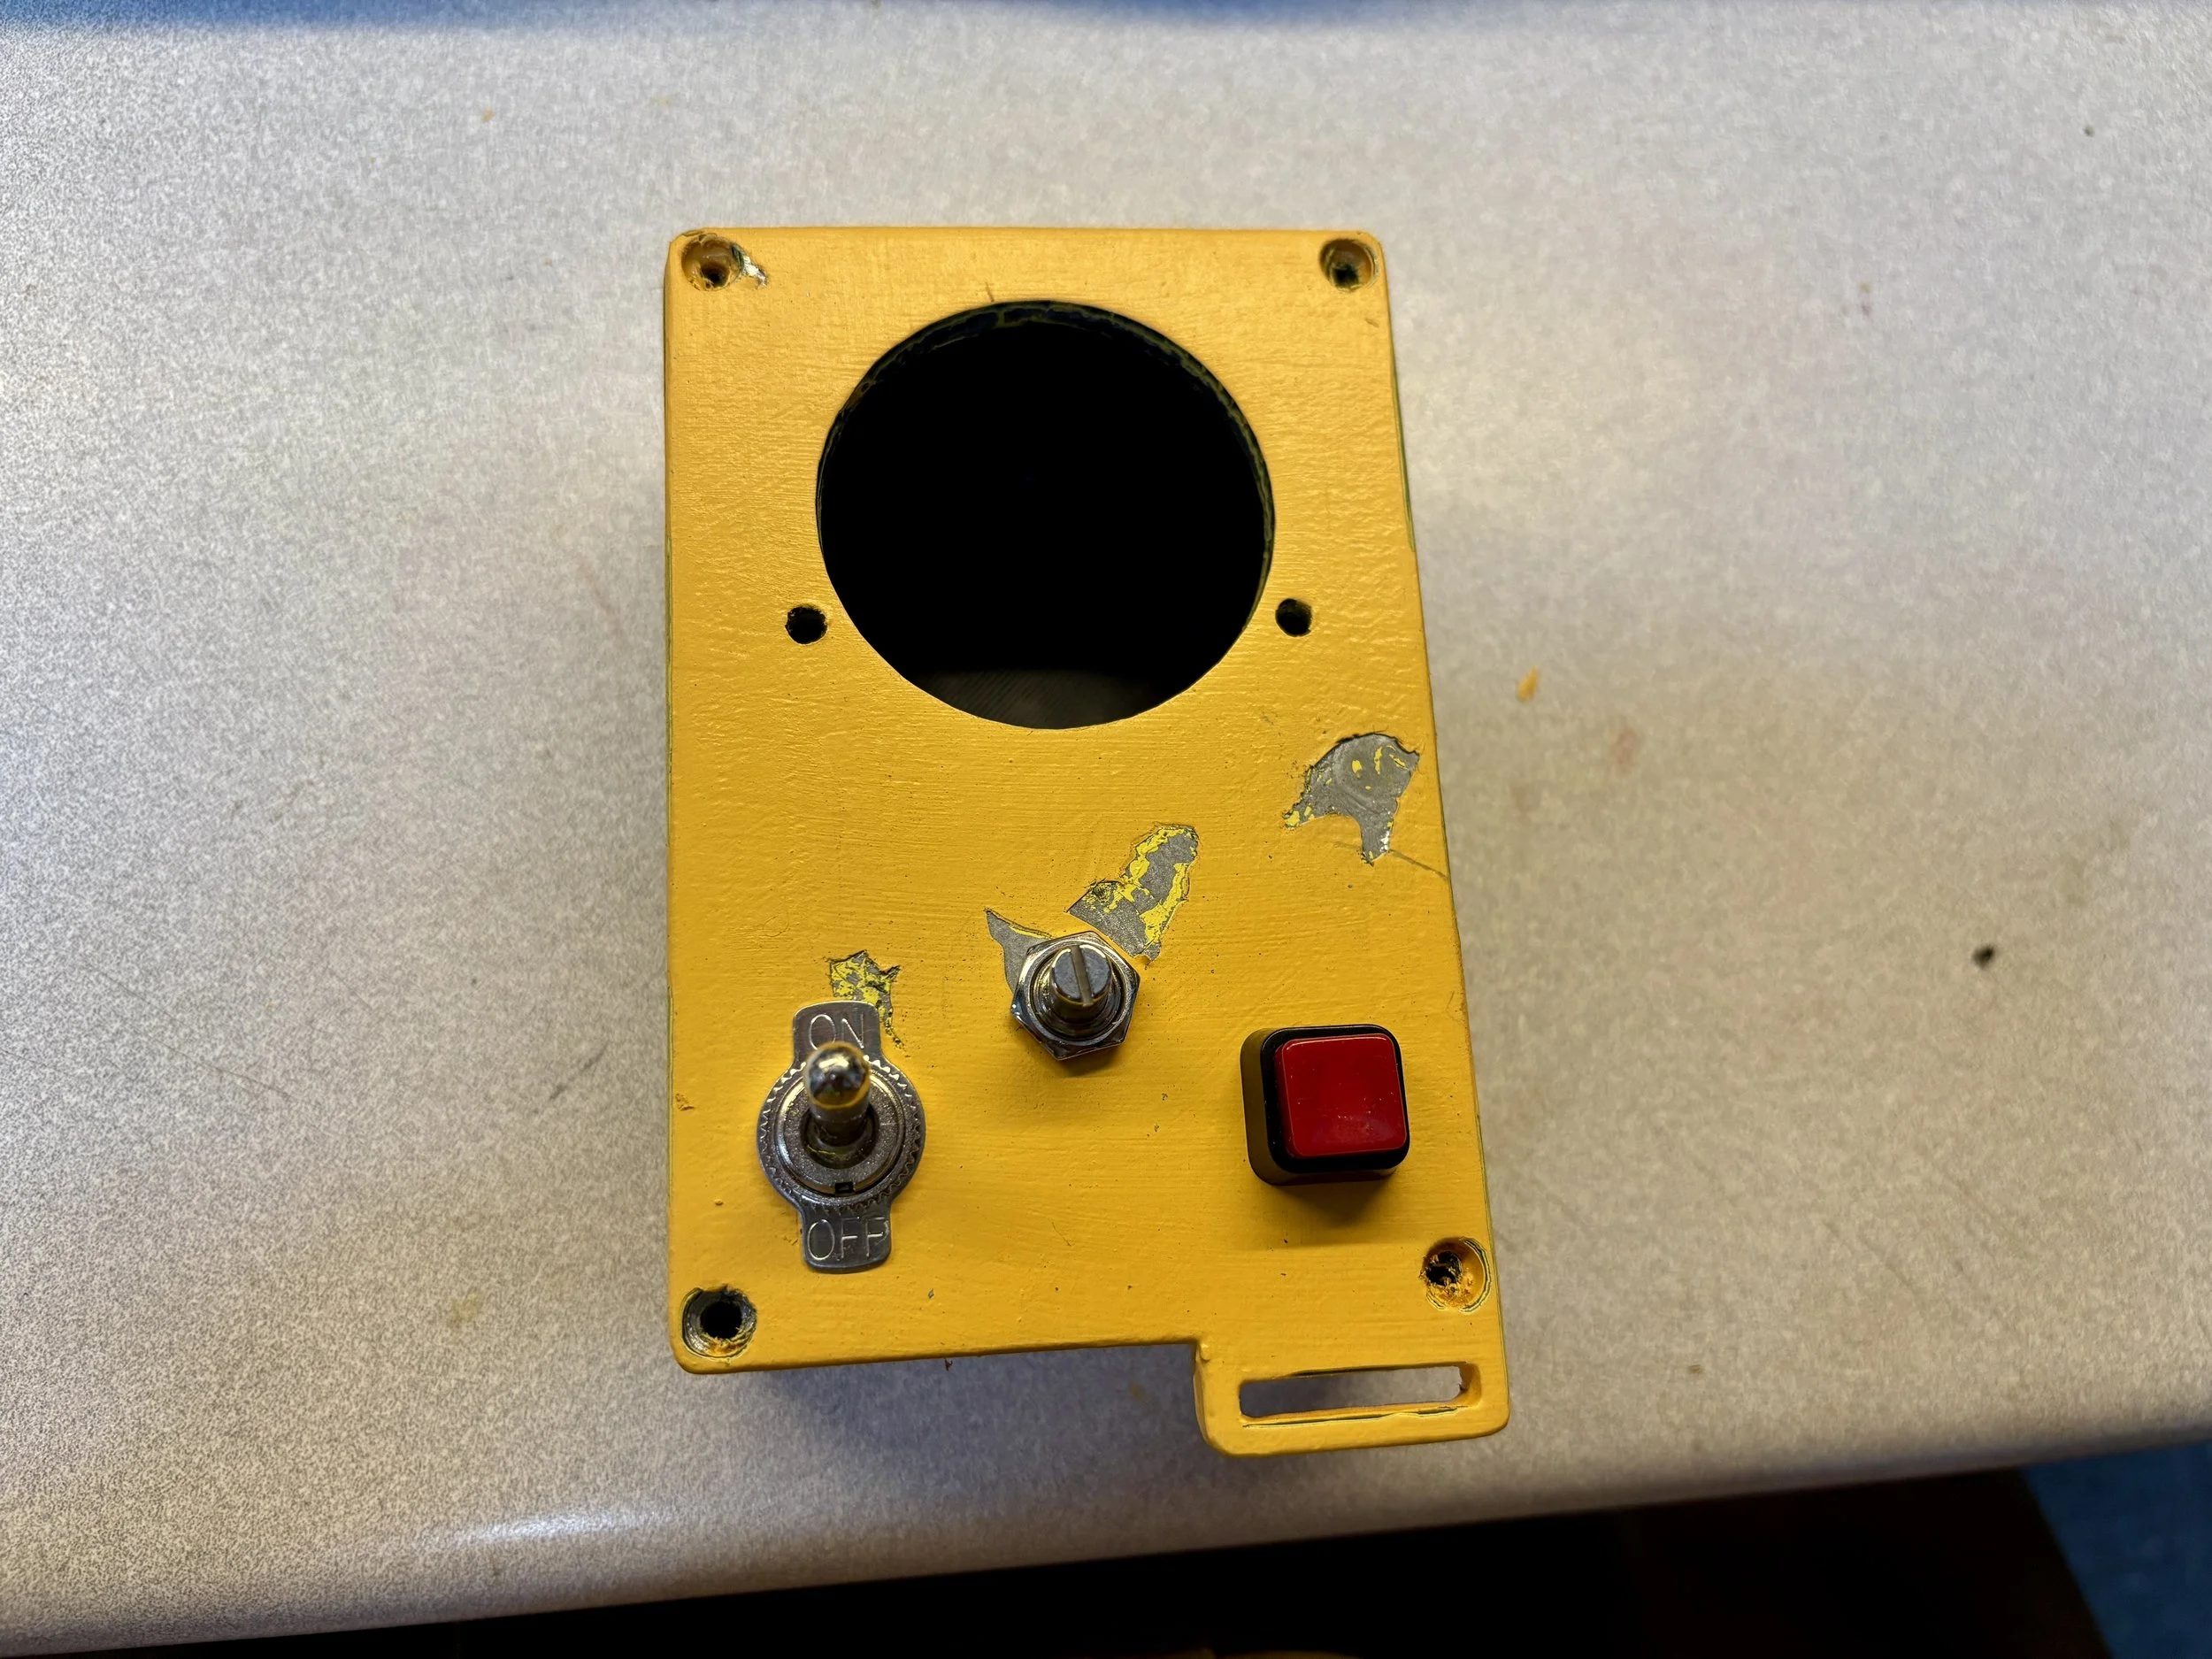
I wired the push button to a battery pack and the pre-purchased voltmeter so that it would trigger the screen to read high levels of radiation.
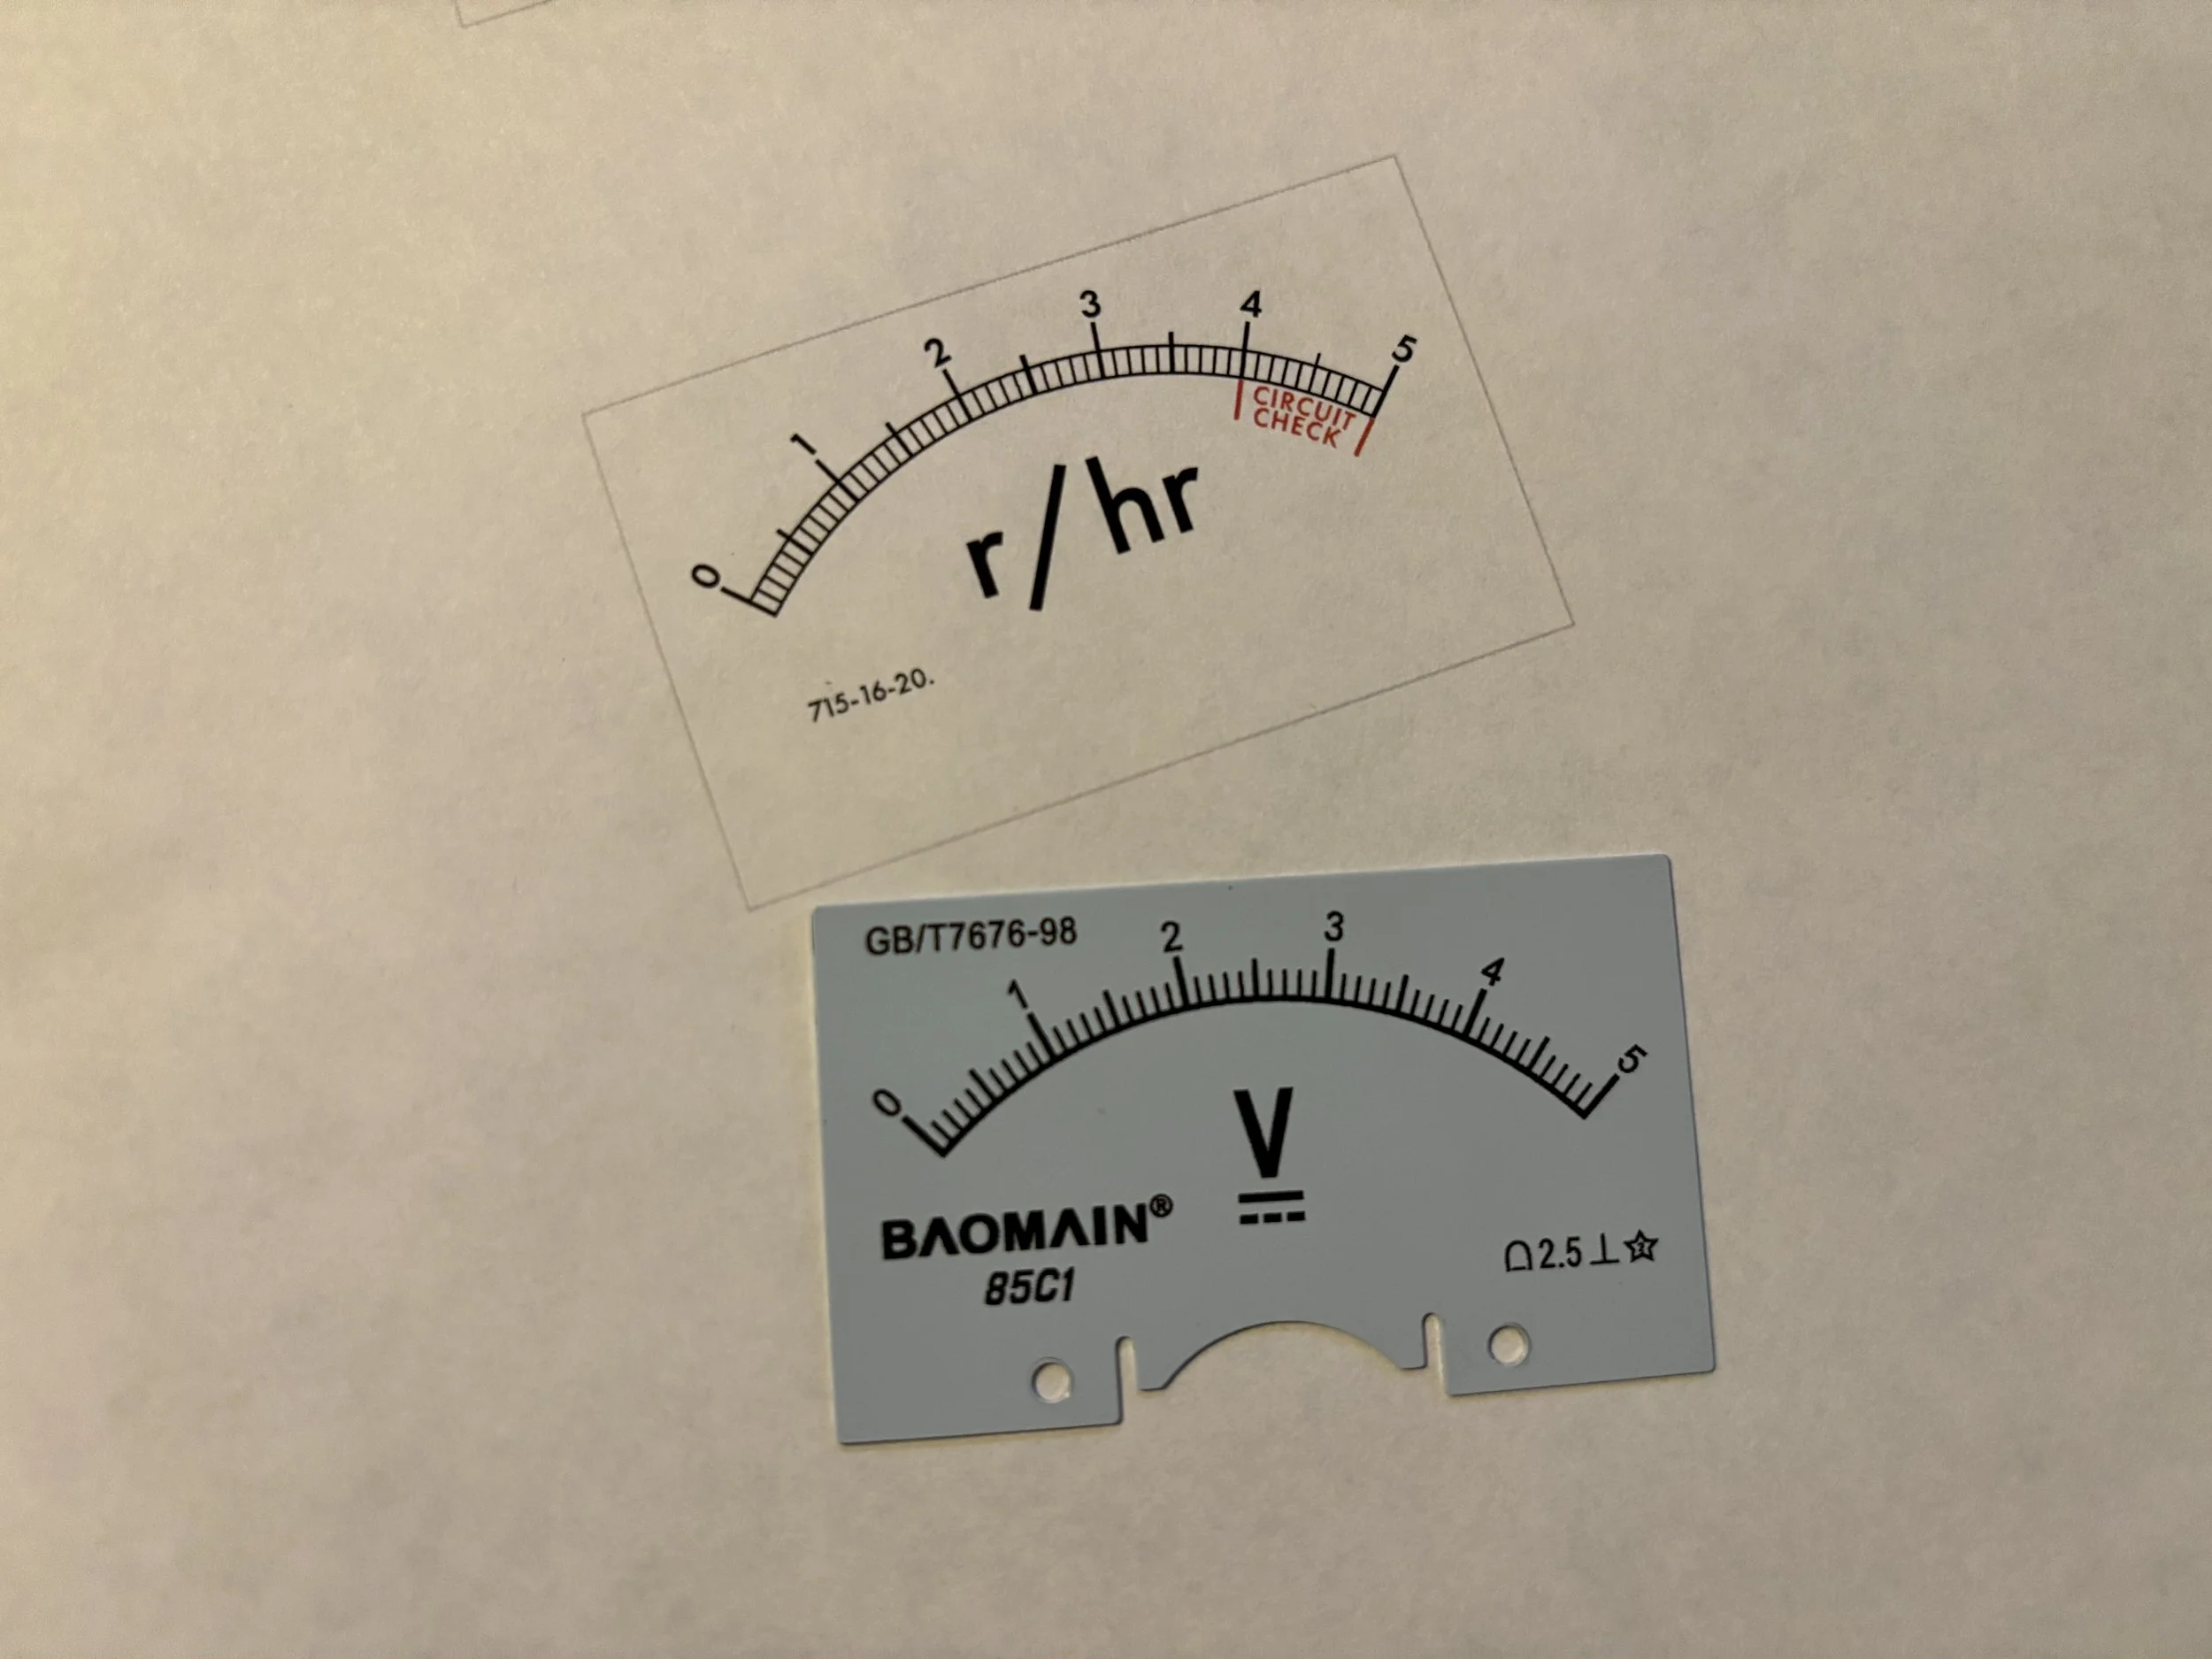
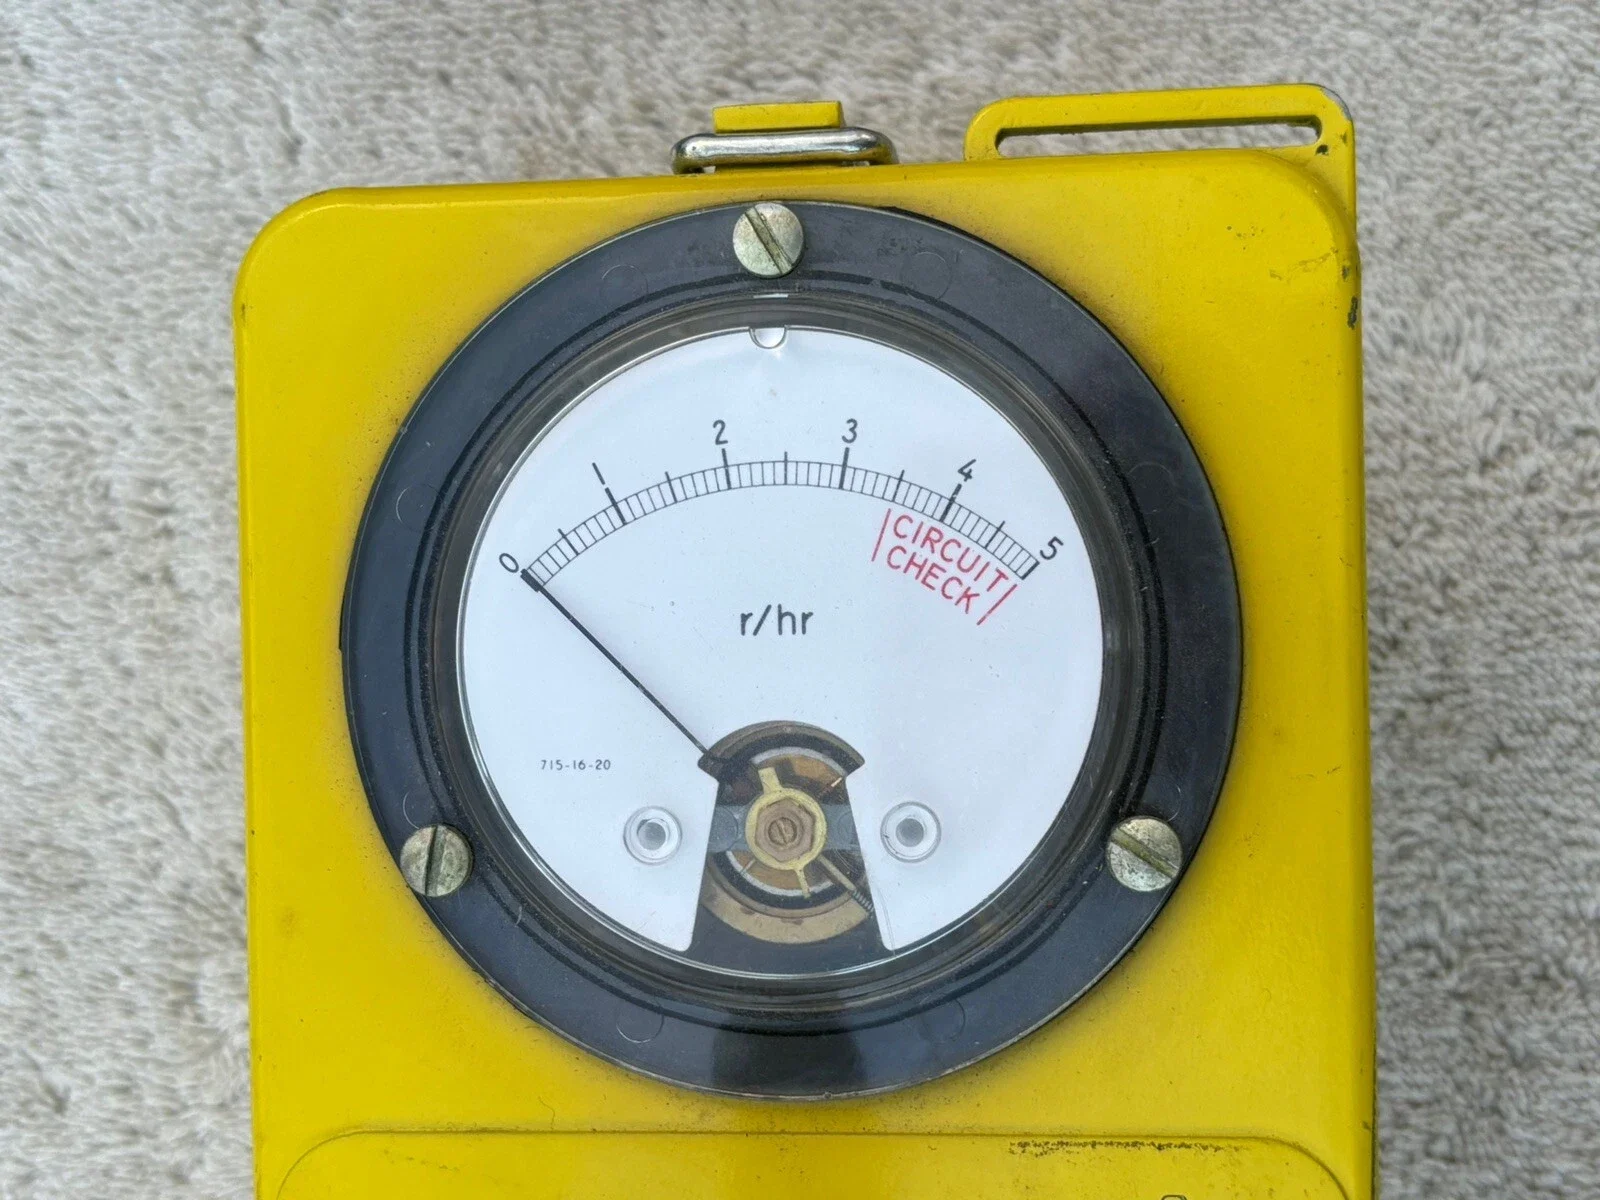
Above, you’ll see how I next created a new screen label for the voltmeter in Adobe Illustrator based on the Civil Defense Geiger counters.
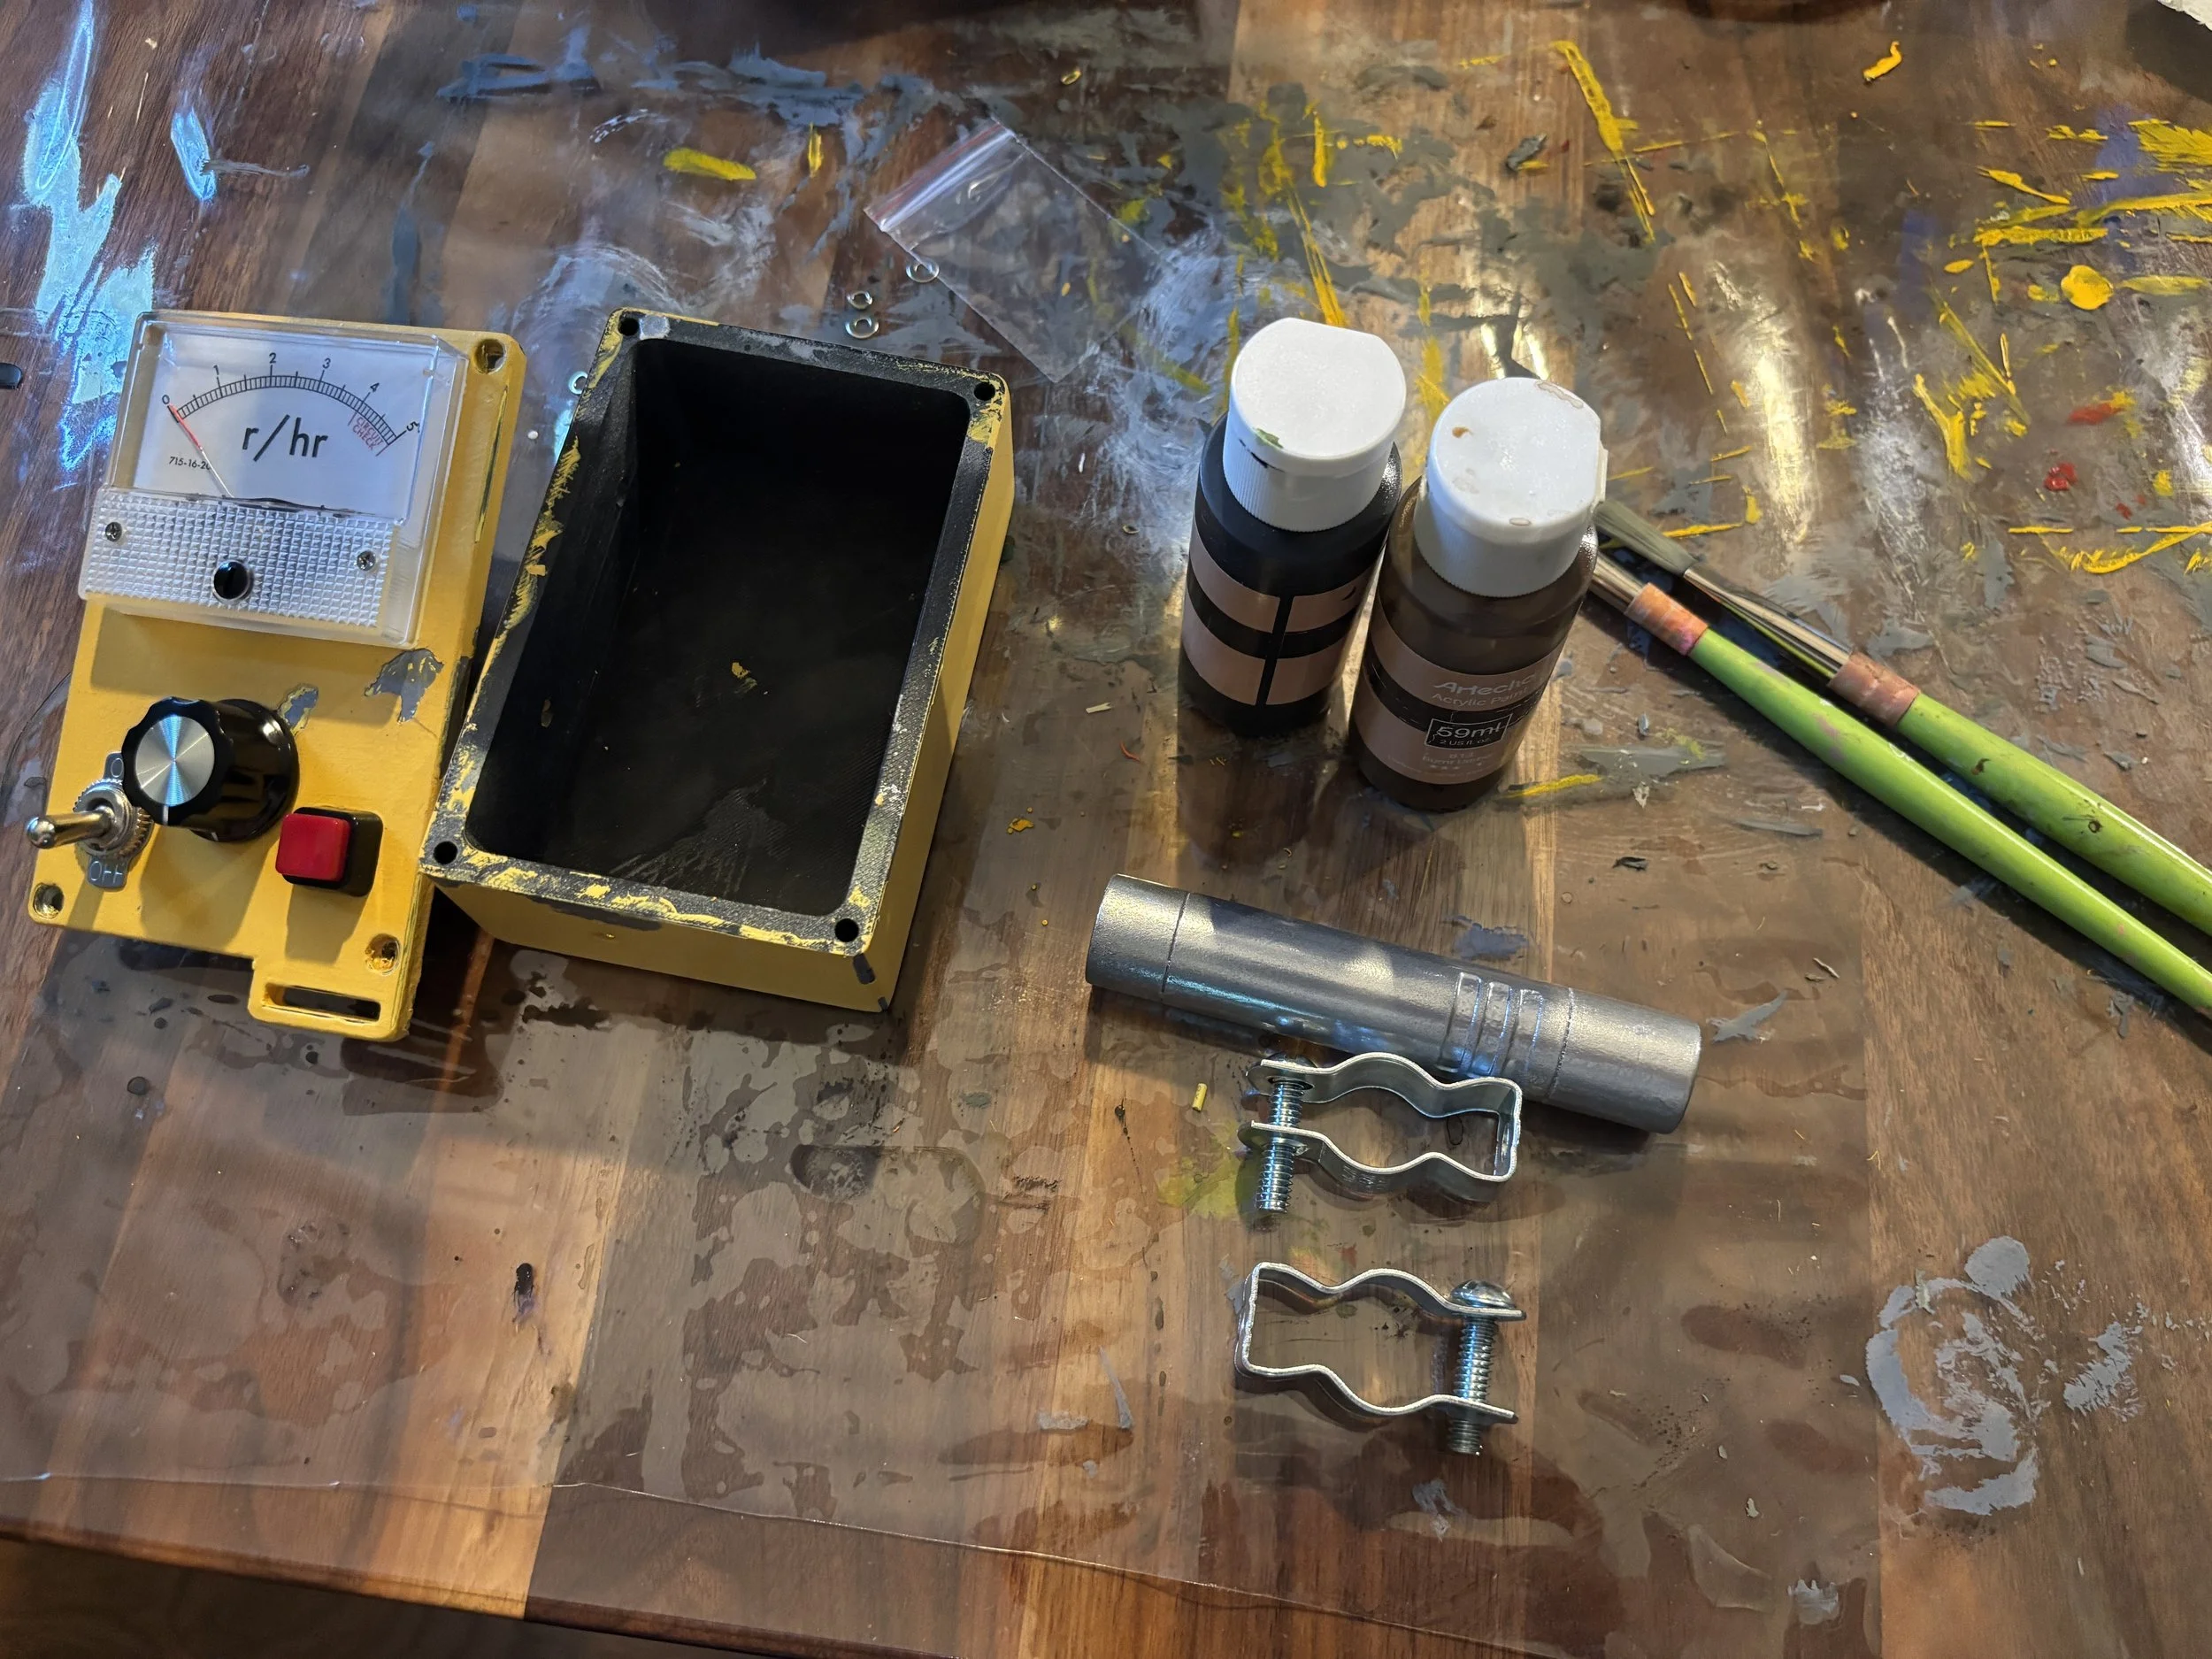
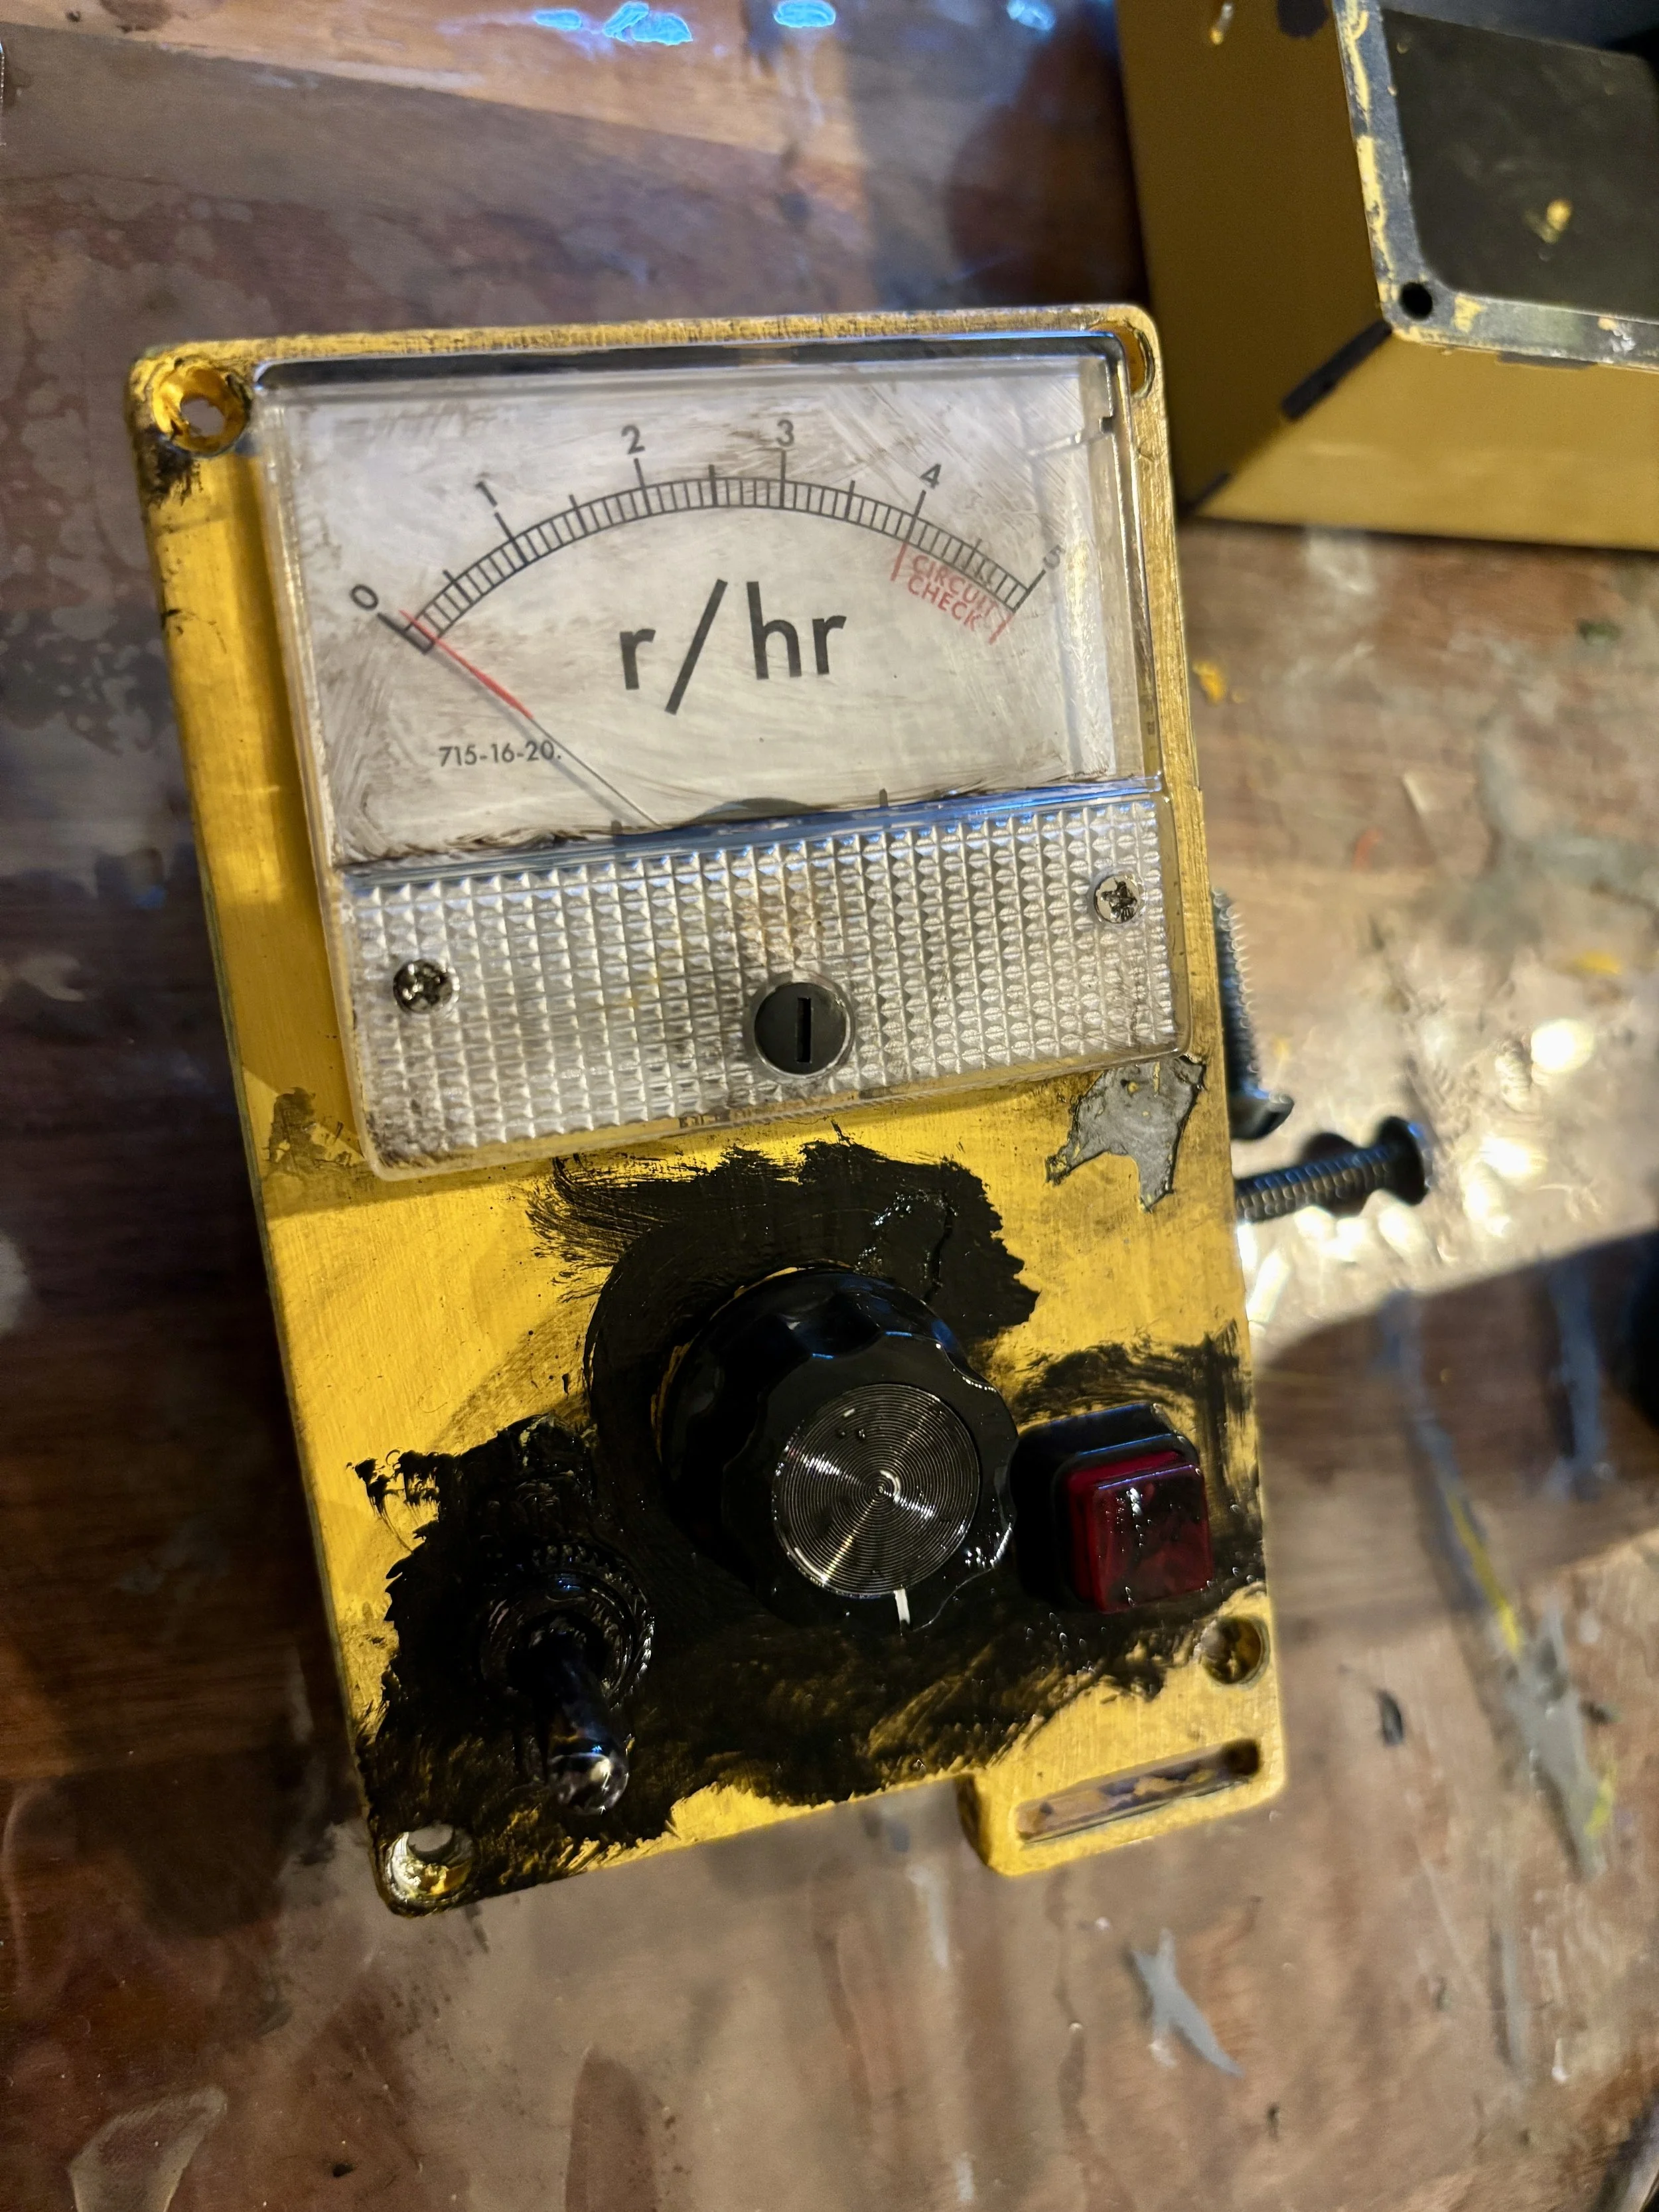
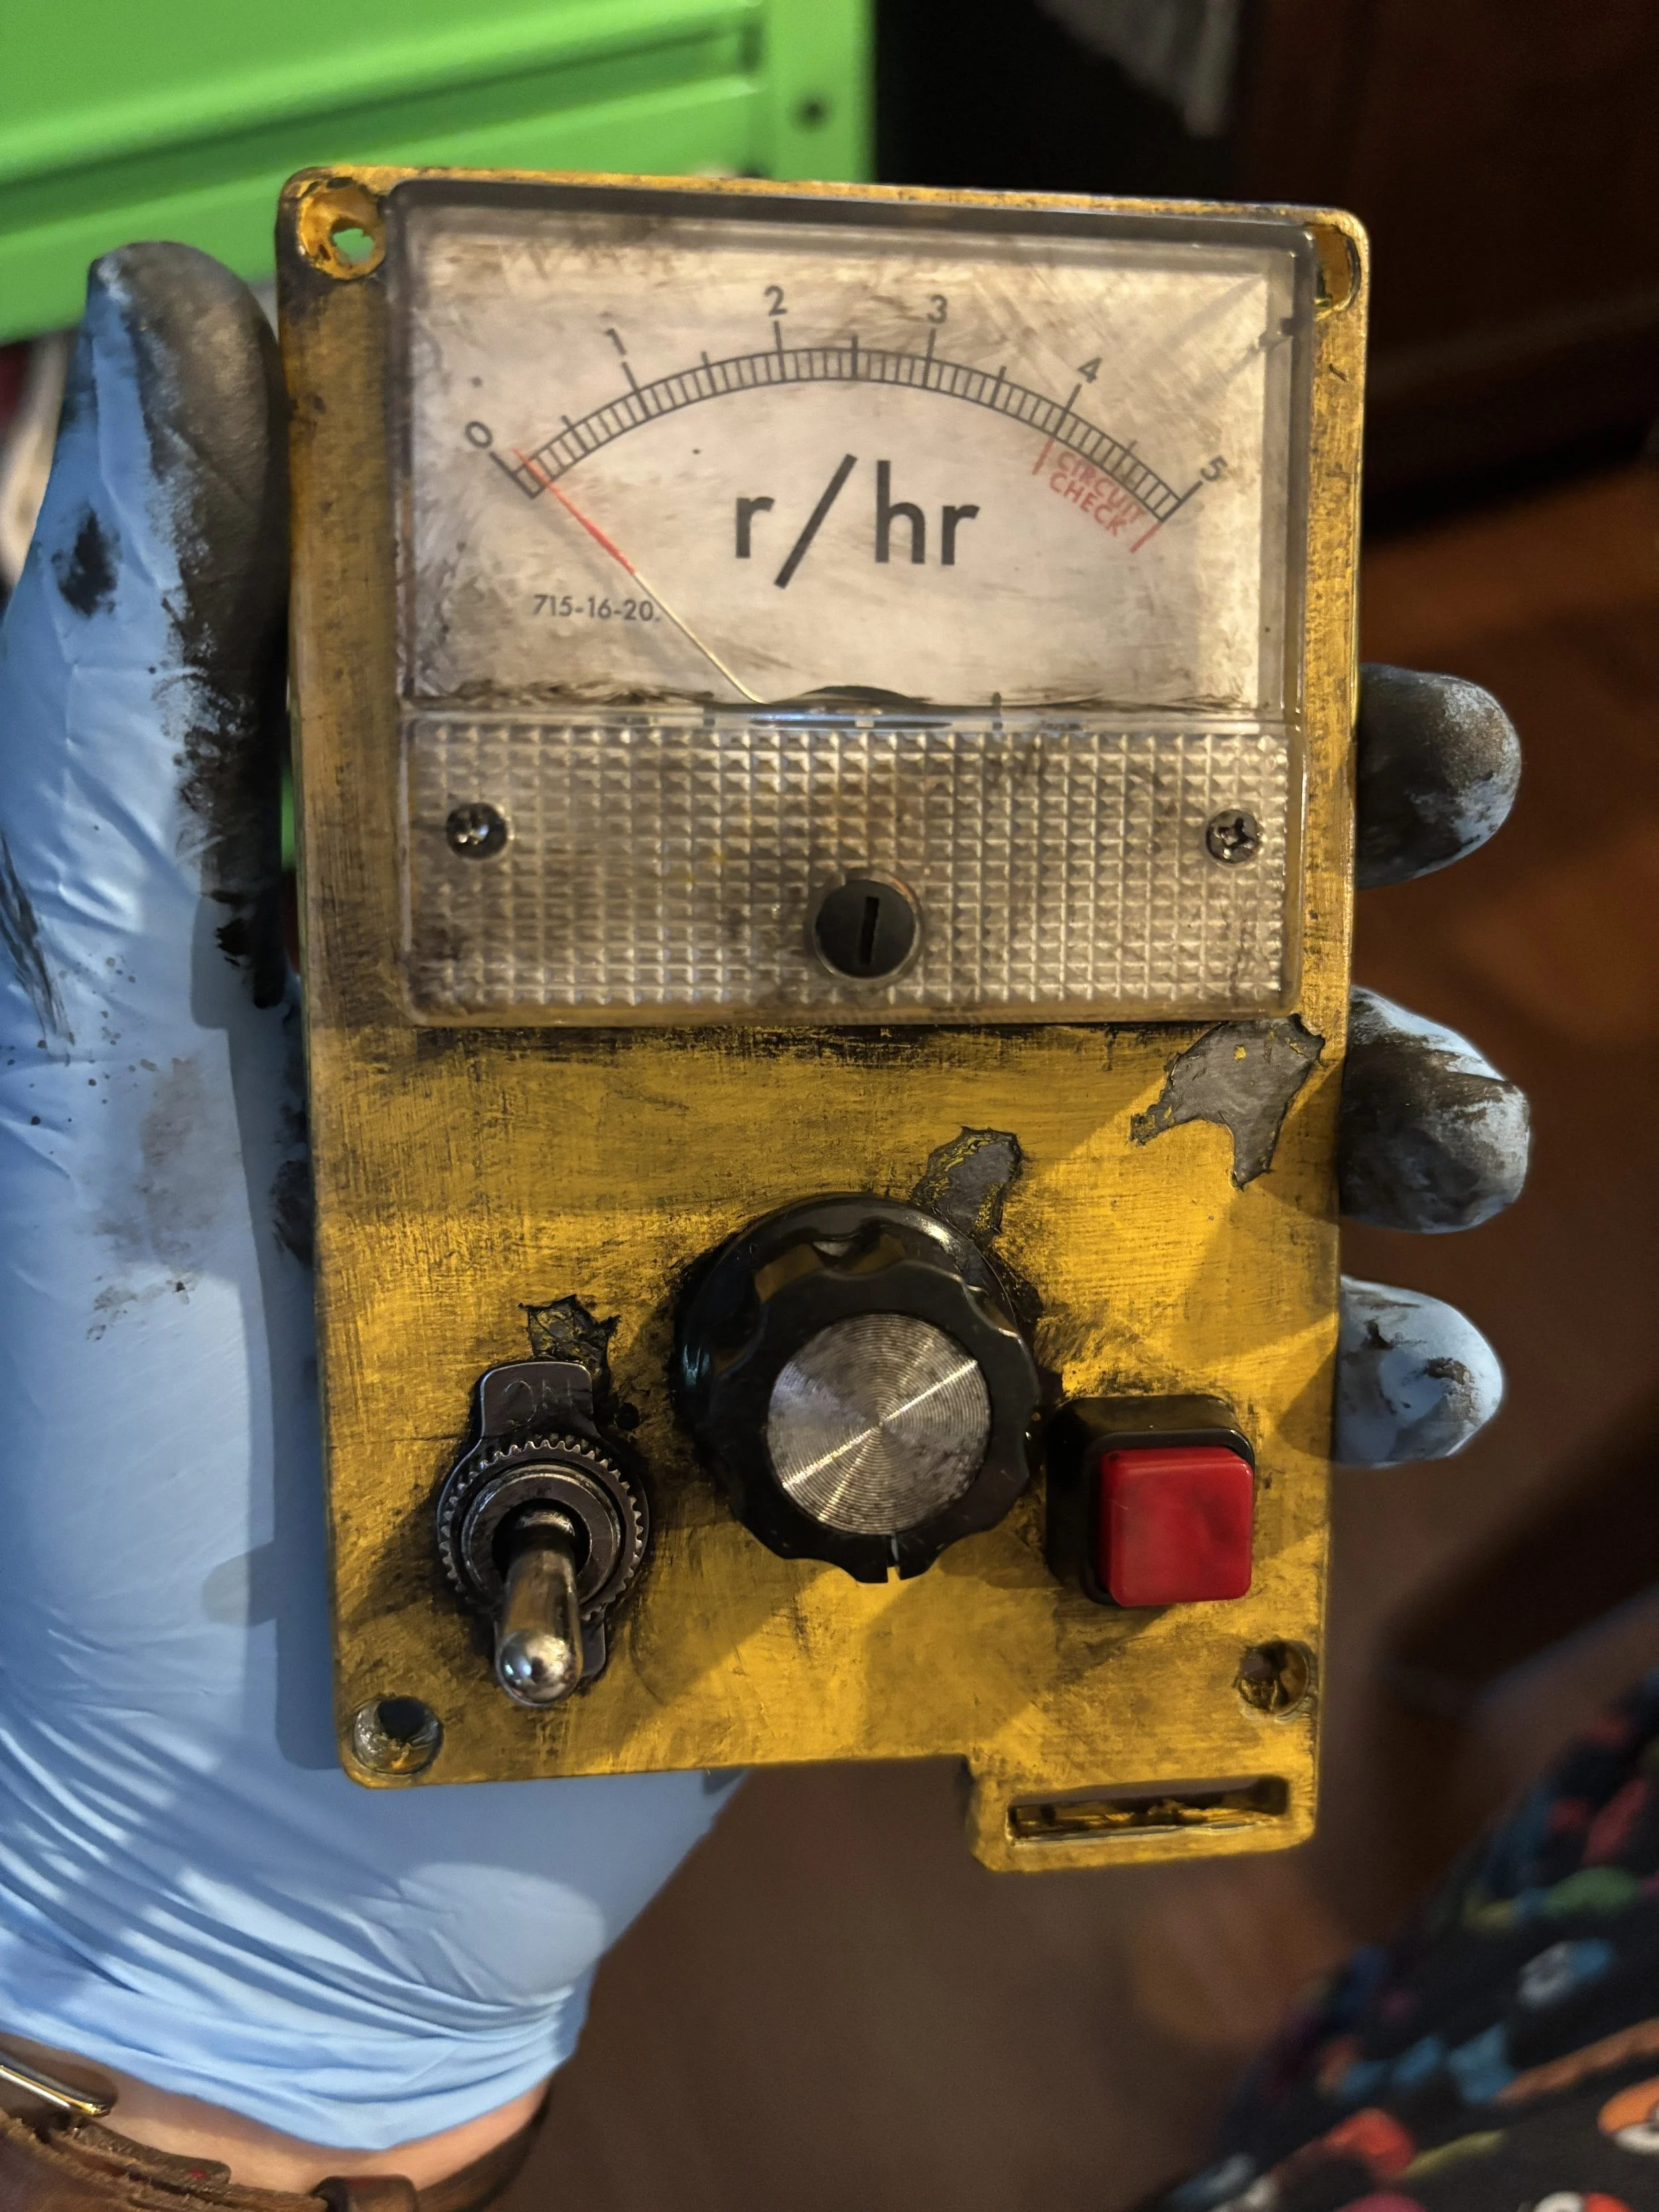
I used paint washes to age the item. Since it will be viewed theatrically from a distance, it needs a little more distress than you would use for something that is on a movie screen.
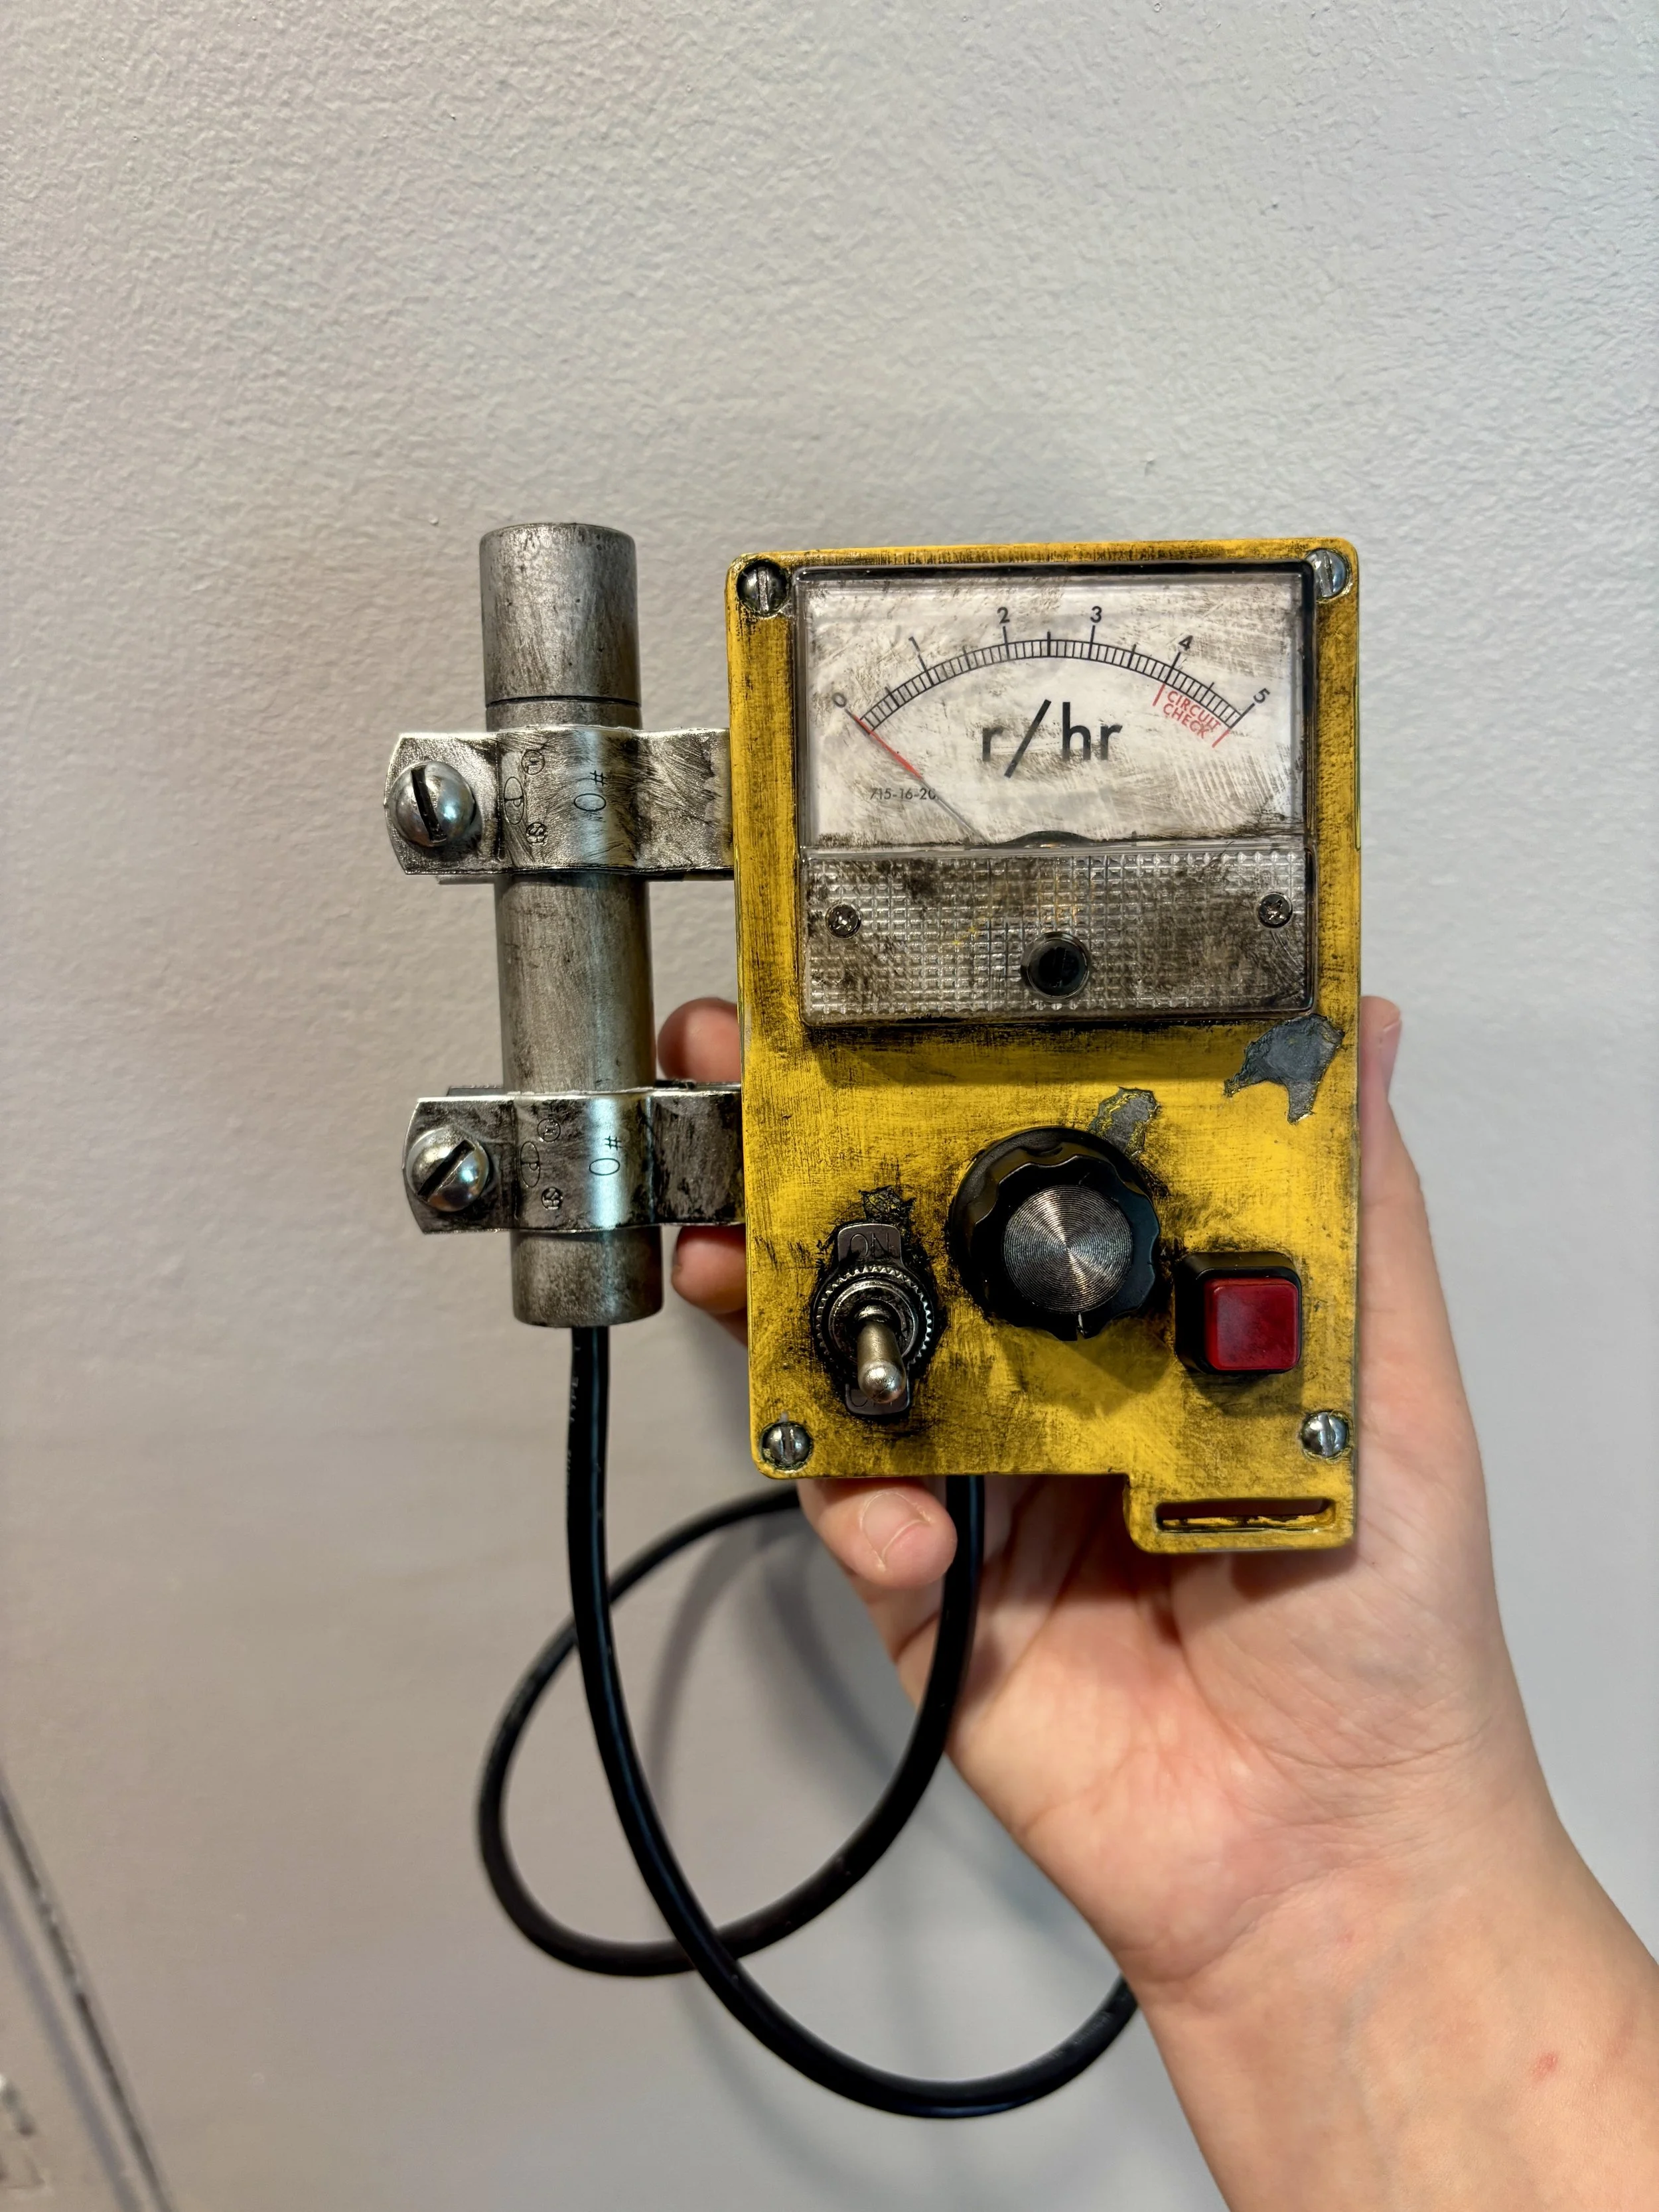
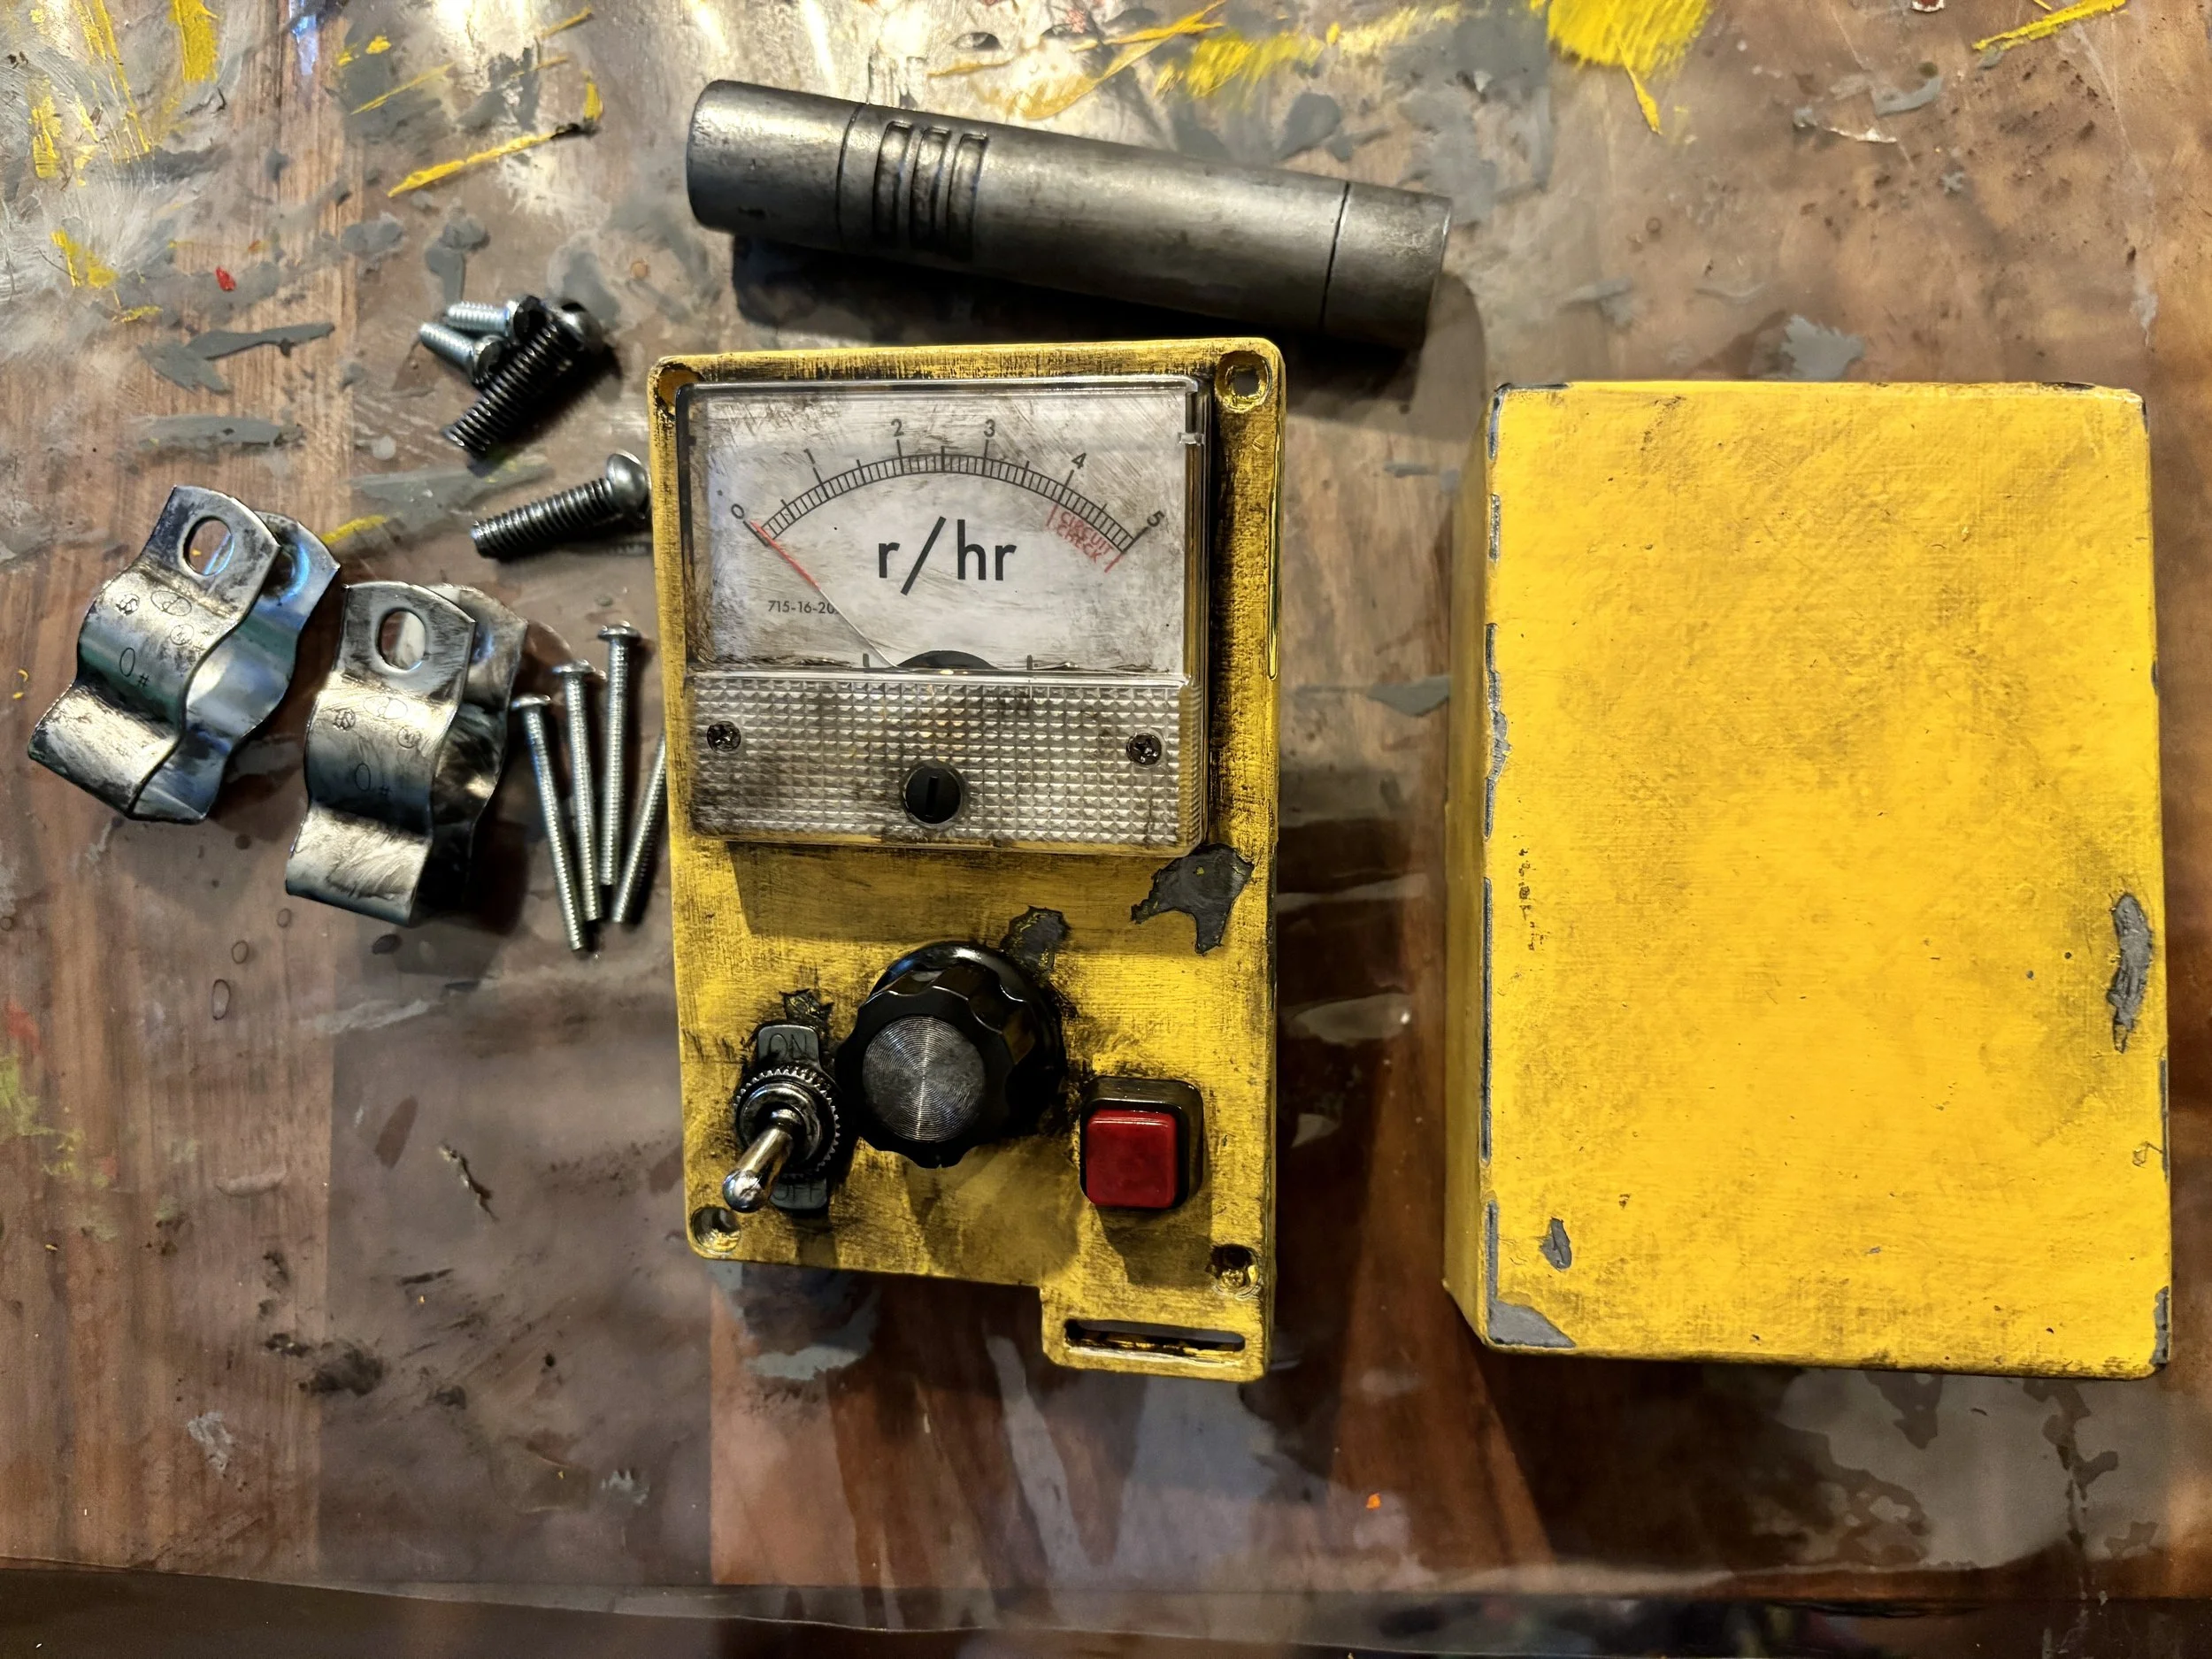
And here’s the final item assembled and ready to go into rehearsal!